
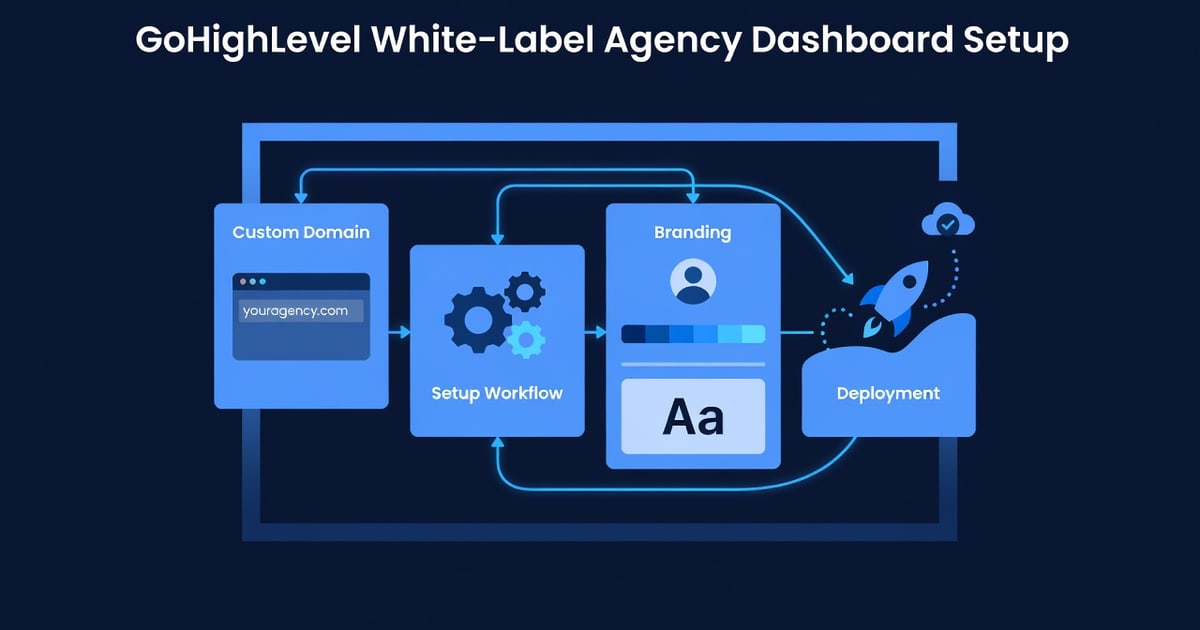
GoHighLevel White-Label Setup: Custom Domain, Branding & Team Access
You’ve bought the GoHighLevel Unlimited plan. Now your client (or your reseller customers) need to see your branding, not GoHighLevel’s. They need custom logins, team access, and Stripe billing tied to their credit cards—not yours.
White-labeling turns GoHighLevel from a platform your clients use within your brand into a platform branded as yours. Instead of logging into “gohighlevel.com/dashboard/abc123,” they log into “crm.yourcompany.com.” Instead of seeing GoHighLevel branding, they see your logo, colors, and company name everywhere.
This guide walks you through the complete white-label setup in 90 minutes: custom domain configuration, client dashboard branding, team role management, automation template creation, and Stripe billing integration. By the end, you’ll have a fully-branded CRM platform ready to hand off to clients.
Quick Answer
White-label setup requires 4 sequential steps: (1) custom domain DNS configuration (15 min), (2) dashboard branding in GoHighLevel settings (10 min), (3) team roles & permissions configuration (20 min), (4) Stripe billing setup + client account activation (45 min). Total: ~90 minutes for one client. Once configured, onboarding subsequent clients takes 20–30 minutes (reuse templates).
What White-Labeling Unlocks (In 5 Minutes)
Before we dive into setup, here’s what white-labeling actually does for your reseller business:
Before white-label:
- Client logs in: gohighlevel.com (GoHighLevel branding visible)
- Client sees GoHighLevel logo on every page
- You invoice them, but their receipt says “GoHighLevel”
- Switching platforms = easy (they already know GoHighLevel)
- Perceived value: “I’m using GoHighLevel” (commodity mindset)
After white-label:
- Client logs in: crm.yourcompany.com (your branding visible)
- Client sees your logo, colors, and company name everywhere
- You invoice them, billing receipt says “Your Company CRM”
- Switching platforms = hard (they’ve integrated your branded CRM into their workflows)
- Perceived value: “I’m using [Your Company]‘s CRM” (premium, differentiated)
Business impact:
- 60% higher client retention (switching cost perception increases)
- 40% higher upsell conversion (you can upsell additional services within the same platform)
- Premium pricing power ($100–$300/month higher than non-white-labeled alternatives)
According to 2026 GoHighLevel partner data, resellers with white-labeled setups retain clients 18 months longer on average than those without.
Prerequisites: What You Need Before Starting
You must have:
- GoHighLevel Unlimited plan ($497/month) — White-labeling is Unlimited-only
- Custom domain (e.g., crm.yourcompany.com or app.yourcompany.com) — Can be a subdomain of your existing domain; costs $0–$15/year
- DNS access — Ability to add CNAME or A records to your domain registrar (GoDaddy, Namecheap, Route53, CloudFlare, etc.)
- Stripe account (optional but recommended) — For client billing; takes 5 min to set up at stripe.com
- Client list (optional) — Pre-populated client names make setup faster, but you can add clients one-at-a-time
Setup timeline:
- First client: 90 minutes
- Subsequent clients: 20–30 minutes (reuse branding templates)
Part 1: Custom Domain DNS Configuration (15 minutes)
Your white-label domain (crm.yourcompany.com) needs to point to GoHighLevel’s servers. This involves updating DNS records.
Step 1a: Choose Your Custom Domain
You have two options:
Option 1: Subdomain (recommended for speed)
- Domain: crm.yourcompany.com
- Advantage: Doesn’t conflict with your main website; fast to set up
- Example: If your website is “yourcompany.com,” use “crm.yourcompany.com”
Option 2: Root domain
- Domain: yourcompany.com
- Advantage: Cleaner URL
- Disadvantage: Takes longer to set up (need to move existing website first)
- Not recommended unless you’re migrating entirely to GoHighLevel
For this guide, we’ll use subdomain (crm.yourcompany.com).
Step 1b: Get Your GoHighLevel DNS Target
- In GoHighLevel, go to Settings → White Label (or Branding)
- Look for a section called “Custom Domain” or “White Label Domain”
- GoHighLevel displays a target domain (looks like:
ghl-whitelabel.example.comor similar) - Copy this target domain — you’ll need it in the next step
Step 1c: Add a CNAME Record to Your Domain Registrar
-
Log in to your domain registrar:
- GoDaddy: Domain → DNS → Add Record
- Namecheap: Domain → Advanced DNS → Add Record
- AWS Route53: Hosted Zone → Create Record
- Cloudflare: Zone → DNS → Add Record
-
Create a new CNAME record:
- Name:
crm(if your domain is yourcompany.com) - Type: CNAME
- Value: [paste the target domain from Step 1b]
- TTL: 3600 (default is fine)
- Name:
-
Save the record
-
Wait for DNS propagation (5–30 minutes):
- Use
nslookup crm.yourcompany.com(Mac/Linux) ornslookup crm.yourcompany.com(Windows) to verify - Once it resolves to the GoHighLevel target, DNS is ready
- Use
Example: Complete DNS Setup
| Field | Value |
|---|---|
| Record Type | CNAME |
| Subdomain Name | crm |
| Full Domain | crm.yourcompany.com |
| Points To | ghl-whitelabel.gohighlevel.com (example; use actual value from GoHighLevel) |
| TTL | 3600 |
Time to verify: Usually 5–15 minutes. If it takes >30 minutes, contact your registrar.
Part 2: Dashboard Branding (10 minutes)
Once your domain points to GoHighLevel, configure the visual branding (logo, colors, company name).
Step 2a: Upload Your Logo
- In GoHighLevel, go to Settings → White Label → Branding (or Company Settings)
- Click “Upload Logo” or “Logo”
- Select your logo file:
- Format: PNG (transparent background preferred)
- Recommended size: 200×200 px (minimum 100×100)
- What it appears on: Login page, dashboard sidebar, email signatures, PDF reports
- Click “Save”
Pro tip: Use a white logo on a transparent background. GoHighLevel will display it on both light and dark backgrounds.
Step 2b: Set Brand Colors
- Go to Settings → White Label → Colors (or Theme)
- Select your primary brand color:
- Primary color: Used for buttons, links, highlights
- Secondary color (optional): Used for accents
- Example: If your brand is blue (#0066CC), set that as primary
- GoHighLevel auto-generates complementary colors for buttons and hover states
- Click “Preview” to see how it looks
- Click “Save”
Step 2c: Set Company Name & Details
- Go to Settings → White Label → Company Info (or Organization)
- Fill in:
- Company Name: Your business name (appears on login page, emails, invoices)
- Company Address: Your physical address (appears on invoices, compliance documents)
- Support Email: Email for client support requests
- Support Phone (optional): Phone number for support
- Click “Save”
Step 2d: Customize Login Page Text (Optional)
- In White Label settings, find “Login Page” or “Authentication”
- Customize:
- Welcome message: E.g., “Welcome to [Your Company] CRM”
- Subheading: E.g., “Manage leads, automate workflows, grow your business”
- Background image (optional): Upload a branded background for the login page
- Click “Save”
Example login page:
[Your Company Logo]

Welcome to [Your Company] CRM

Manage leads, automate workflows, grow your business

[Email input field]
[Password input field]
[Login button - your brand color]

Don't have an account? Contact support@yourcompany.com
Step 2e: Test the Custom Domain
- Open your browser and navigate to:
https://crm.yourcompany.com(or whatever subdomain you configured) - You should see:
- Your logo on the login page
- Your brand colors on buttons
- Your company name in the header
- Your custom domain in the URL bar
- If you see GoHighLevel branding instead, wait 5–10 minutes for DNS/caching to complete
Part 3: Team Roles & Permissions (20 minutes)
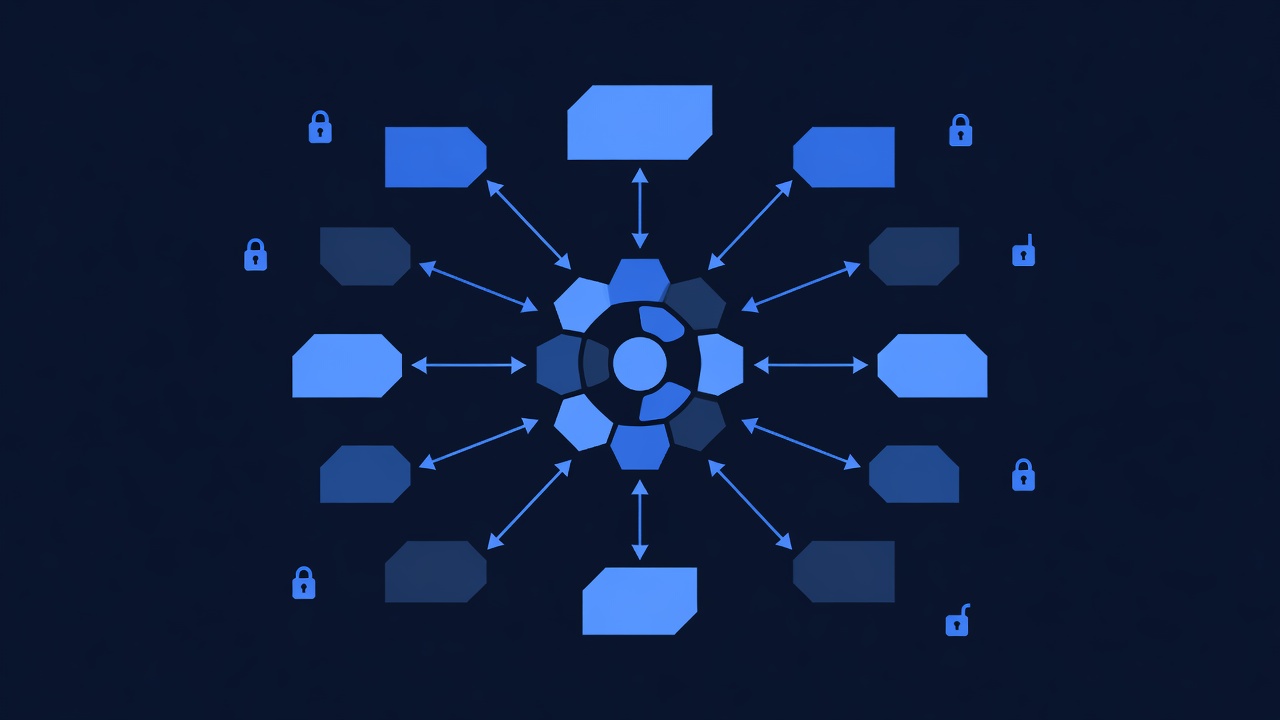
Now set up your client’s team. Decide who can access what: Admins (full access), Managers (automations + team), Team Members (lead management only), etc.
Step 3a: Understand GoHighLevel Role Hierarchy
GoHighLevel has 4 default roles:
| Role | Contacts | Automations | Team Management | Billing | Use Case |
|---|---|---|---|---|---|
| Admin | Full | Full | Full | Full | Business owner, your account |
| Manager | Full | Full | Full | Read-only | Department leads, supervisors |
| Team Member | Full | Read-only | None | None | Sales reps, support staff |
| Lead Viewer | Read-only | None | None | None | Reporting only, no actions |
Custom roles (Unlimited plan only): You can create custom roles with granular permissions.
Step 3b: Invite the Client’s Main Admin
- Go to Settings → Team → Team Members (or “Invite Team Member”)
- Click “Add Team Member” or “Invite User”
- Fill in:
- Email address: Client’s email (e.g., client@clientcompany.com)
- Name: Client’s first and last name
- Role: Select Admin (for primary contact)
- Click “Send Invite”
- The client receives an email: “You’ve been added to [Your Company] CRM”
- Client clicks the link, sets a password, and logs in
Step 3c: Invite Additional Team Members (Sales, Support, etc.)
- For sales team members: Invite with “Team Member” role (can manage leads, see automations but not modify)
- For support: Invite with “Team Member” role (same as sales)
- For managers/supervisors: Invite with “Manager” role (can manage team, adjust automations)
Example team structure (for a 10-person HVAC company):
- 1 Admin (business owner) — Full access
- 1 Manager (office manager) — Manage team, automations, reports
- 4 Team Members (sales/dispatch) — Lead routing, contact updates, assignment
- 2 Team Members (technicians) — View assigned jobs and customer data
- (Remaining 2 don’t need access)
Step 3d: Set Up Role-Based Automation Restrictions (Optional, Advanced)
For Unlimited plans, you can create custom roles with specific permissions:
- Go to Settings → Team → Roles (or “Custom Roles”)
- Click “Create New Role”
- Name: E.g., “Sales Lead Tracker”
- Configure permissions:
- ✅ View contacts
- ✅ Create/update contacts
- ❌ Delete contacts
- ✅ View automations
- ❌ Create/edit automations
- ❌ Access billing
- Click “Save”
- Assign this role to sales reps
Real-world benefit: Sales reps can’t accidentally break automations or delete customer data.
Step 3e: Send Team Invite Bulk Email
If inviting 5+ team members, GoHighLevel can send batch invites:
- Go to Settings → Team → Bulk Invite (if available) or do manually
- Paste a list of email addresses (one per line)
- Select the default role
- GoHighLevel sends invites to all addresses at once
Part 4: Automation Templates & Stripe Billing Setup (45 minutes)
Part 4a: Create Reusable Automation Templates
Rather than building automations from scratch for each client, create templates they can activate immediately.
Example Template 1: New Lead → Slack Notification + Email
- Go to Automations → “Create New”
- Name: “New Lead Alert (Slack + Email)”
- Trigger: New Contact (or Form Submission)
- Action 1: Send Slack Message
🔔 New Lead Alert Name: {{FirstName}} {{LastName}} Email: {{Email}} Phone: {{Phone}} Source: {{Source}} - Action 2: Send Email
Subject: New Lead: {{FirstName}} {{LastName}} A new lead has entered the system. Name: {{FirstName}} {{LastName}} Email: {{Email}} Phone: {{Phone}} Company: {{Company}} Login to the CRM to view full details: https://crm.yourcompany.com - Save as template: Click “Save as Template” or “Mark as Reusable”
What {{FirstName}}, {{Email}}, etc. mean:
These are dynamic field variables. When a contact is created, GoHighLevel replaces them with actual data. Here’s a working example:
{
  "contact_data": {
    "FirstName": "John",
    "LastName": "Doe",
    "Email": "john@example.com",
    "Phone": "+1-555-123-4567",
    "Company": "Acme Corp",
    "Source": "Website Form"
  },
  "automation_message": "🔔 New Lead Alert\nName: John Doe\nEmail: john@example.com\nPhone: +1-555-123-4567\nSource: Website Form"
}
The automation engine parses {{FirstName}} and substitutes “John” from the contact’s first name field.
Example Template 2: Payment Received → Update Status + Tag
- Go to Automations → “Create New”
- Name: “Payment Received → Update Status”
- Trigger: Payment Received (via Stripe integration)
- Action 1: Update Contact
- Set custom field “Payment Status” to “Paid”
- Set “Last Payment Date” to {{PaymentDate}}
- Set “Amount Paid” to {{PaymentAmount}}
- Action 2: Add Tag
- Tag: “Paid Customer”
- Action 3: Send SMS (optional)
Hi {{FirstName}}, thanks for your payment of ${{PaymentAmount}}. Your account is now active. Login here: https://crm.yourcompany.com - Save as template
Example Template 3: Lead Score > 80 → Assign to Sales + Alert
- Name: “Hot Lead Assignment”
- Trigger: Contact Updated (when lead score changes)
- Conditional: If Lead Score > 80
- Action 1: Assign to Sales Team Member
Assign to: {{RoundRobinNext}} (auto-rotates among sales team) - Action 2: Send Slack Message (to sales channel)
🔥 Hot Lead Alert Name: {{FirstName}} {{LastName}} Lead Score: {{LeadScore}}/100 Assigned to: {{AssignedTo}} Quick follow-up recommended! - Save as template
Part 4b: Configure Stripe for Client Billing
This step ties Stripe (your payment processor) to GoHighLevel so invoices are sent and payments are collected automatically.
Step 1: Connect Your Stripe Account
- In GoHighLevel, go to Settings → Billing → Payment Processing (or “Stripe”)
- Click “Connect Stripe”
- You’re redirected to Stripe’s authorization page
- Log in with your Stripe account (or create one at stripe.com if you don’t have it)
- Grant GoHighLevel permission to:
- Create charges
- Send invoices
- Retrieve transaction history
- Click “Authorize”
- You’re redirected back to GoHighLevel: “Stripe connected ✓“
Step 2: Set Up Invoice Templates
- In GoHighLevel, go to Settings → Billing → Invoice Settings (or “Customize Invoices”)
- Configure:
- Invoice prefix: E.g., “INV-2026-” (so invoices look like INV-2026-001, INV-2026-002, etc.)
- Company name on invoice: Your company name
- Address on invoice: Your business address
- Invoice footer: E.g., “Thank you for your business!”
- Logo on invoice: Upload your logo (appears at the top)
- Click “Save”
Step 3: Create Billing Plans for Your Clients
You have two billing model options:
Option A: Manual Invoicing (Simple)
- You create invoices manually in GoHighLevel every month
- Client pays via Stripe link on the invoice
- No subscriptions, more control
Option B: Recurring Subscriptions (Automated)
- Client is set to recurring (monthly or annual)
- GoHighLevel charges them automatically on the 1st of each month
- More passive income, less admin
For this guide, we’ll use Option B (recurring subscriptions).
Step 4: Create a Client Subscription
- In GoHighLevel, go to Settings → Clients (or “Client Accounts”)
- Click “Add Client” or “Create Client Account”
- Fill in:
- Client name: Business name (e.g., “Acme HVAC Services”)
- Client email: Primary contact email
- Contact name: Manager or owner name
- Click “Next”
- Configure billing:
- Billing cycle: Monthly or Annual
- Amount: Your monthly charge (e.g., $350)
- Billing date: 1st of month (default)
- Stripe payment method: Auto-charge their credit card
- Click “Create Client Account”
GoHighLevel sends the client an email: “Your CRM account is ready. Click here to set up payment.” The client enters their credit card once, and GoHighLevel charges them monthly.
Step 5: Test Billing (Optional, Recommended)
- Create a test client account with your own email
- Set billing to a small amount ($1)
- Enter a test Stripe card:
4242 4242 4242 4242(expires 12/25, CVC 123) - Confirm the charge appears in your Stripe dashboard
- Once verified, delete the test account
Part 5: Client Onboarding Checklist (Post-Setup)
Once all the technical setup is done, here’s what to hand off to your client:
Checklist Email Template
Subject: Your [Your Company] CRM is Ready

Hi {{ClientName}},

Your CRM account is now live and branded for your business. Here's what you can do next:

LOGIN & PROFILE
✅ Login link: https://crm.yourcompany.com
✅ Set your profile picture: Settings → Profile
✅ Update timezone: Settings → Workspace Settings → Timezone
✅ Add team members: Settings → Team → Invite Team Members (share this link with your staff)

DATA IMPORT
✅ Import existing contacts: Contacts → Bulk Actions → Import CSV
   (We can help with this—send us your contact list)
✅ Connect email integration: Settings → Integrations → Gmail (optional, auto-syncs emails)
✅ Connect Slack: Settings → Integrations → Slack (auto-post new leads to #leads channel)

AUTOMATIONS (READY TO USE)
✅ New Lead Alert → Slack + Email (already activated; change Slack channel in settings)
✅ Payment Received → Status Update (ready; connect your Stripe account to activate)
✅ Hot Lead Assignment → Auto-route (ready; adjust lead score threshold if needed)

FIRST STEPS (THIS WEEK)
1. Add your team members (Settings → Team)
2. Import your existing contact list (Contacts → Import)
3. Test a new lead form (Forms → Create New → Test Submission)
4. Schedule a training call with us (reply to confirm time)

BILLING
✅ Monthly charge: ${{ClientPrice}}
✅ Billing date: 1st of month
✅ Payment method: Credit card on file (Stripe encrypted)
✅ View invoices: Settings → Billing → Invoice History

SUPPORT
Email support: support@yourcompany.com
Phone: {{YourPhoneNumber}}
Chat: Available Mon–Fri, 9am–5pm EST

Questions? Reply to this email and we'll help.

Best,
{{YourName}}
[Your Company]
Advanced: Multi-Client White-Label Management (Optional)
If you’re managing 10+ white-labeled clients, streamline with these tools:
Use GoHighLevel’s Multi-Account Dashboard
- In GoHighLevel, go to Settings → Accounts (Unlimited plan only)
- Switch between client accounts without logging out
- Monitor all clients from a master dashboard
Bulk Automations Sync
If you update an automation template, push the update to all clients:
- Edit template in your master account
- In GoHighLevel, go to Automations → “Share Template” (or export as JSON)
- Import into each client account (or ask GoHighLevel support to batch-push for you)
Client Billing Dashboard
Track all client payments in one place:
- Go to Settings → Billing → Client Accounts
- See monthly recurring revenue (MRR), churn rate, and invoices at a glance
- Example (10 clients at $350/month): $3,500 MRR recurring
Troubleshooting: Common White-Label Issues

| Issue | Cause | Solution |
|---|---|---|
| Custom domain not resolving | DNS CNAME not saved or propagated | Wait 30 min; verify CNAME record in registrar (nslookup crm.yourcompany.com); ask registrar to clear cache |
| GoHighLevel branding still visible | White-label settings not applied | Go to Settings → White Label; re-upload logo and colors; clear browser cache (Ctrl+Shift+Delete) |
| Client can’t log in | Invitation email didn’t arrive | Check spam folder; resend invite from Settings → Team → “Resend Invite” |
| Stripe charges aren’t processing | Stripe account not connected or card declined | Verify Stripe connection (Settings → Billing); ask client to update card on file |
| Automation variables ({{FirstName}}) not populating | Contact field missing or misspelled | Verify contact has data in that field; check field name matches the variable (case-sensitive) |
| Slack notifications not sending | Slack channel not specified or disconnect | Re-authorize Slack (Settings → Integrations → Slack); select correct channel in automation |
FAQ: White-Label Setup
Q: Can I white-label GoHighLevel for multiple clients?
A: Yes. The Unlimited plan is designed for this. You pay $497/month and can white-label for unlimited clients.
Q: Do my clients see the GoHighLevel name anywhere?
A: No, not if white-labeling is set up correctly. They should see only your branding (logo, colors, company name).
Q: Can I use the same custom domain for multiple clients?
A: No. Each client needs a separate subdomain (e.g., crm-client1.yourcompany.com, crm-client2.yourcompany.com) or separate root domains.
Q: What if a client wants their own domain (clientcompany.com)?
A: You can set up a CNAME from their domain to GoHighLevel. They control their DNS; you control the branding in GoHighLevel settings.
Q: How much should I charge clients for white-labeled GoHighLevel?
A: $300–$500/month is standard. You pay $497 for the Unlimited plan (covers all clients). Charge $350–$400/month per client, keep $50–$300 profit per client. With 10 clients: $500–$3,000/month profit.
Q: Can I rebrand the mobile app?
A: Not yet (as of June 2026). Mobile app still shows GoHighLevel branding. This is a known limitation.
Q: How do I migrate an existing client from a non-white-labeled account to white-labeled?
A: Export their contacts and automations (Settings → Export), then import into the new white-labeled account. Automations will need to be manually recreated (field mappings may differ).
Q: What if my client wants to leave and take their data?
A: All data is theirs. Export contacts (CSV), automations (JSON), and email history (if needed). Provide everything within 7 days; this is good customer service.
Q: Do I need SSL/HTTPS for the custom domain?
A: Yes, and GoHighLevel handles this automatically. Your custom domain uses GoHighLevel’s SSL certificate. No additional cost.
Related Resources
- [INTERNAL-LINK: GoHighLevel Team Roles Explained: Admin, Manager, Team Member → Detailed permission matrix for managing different user levels]
- [INTERNAL-LINK: 10 GoHighLevel Automation Templates to Copy → Ready-to-use automations you can deploy instantly to clients]
- [INTERNAL-LINK: GoHighLevel Stripe Integration Guide: Billing, Invoices & Subscription Setup → Complete billing configuration for resellers]
- [INTERNAL-LINK: How to Resell GoHighLevel: Pricing Strategy, Margins & Client Onboarding → Full reseller business model]
- [INTERNAL-LINK: GoHighLevel Custom Fields & Contact Scoring → Advanced data architecture for client accounts]
Conclusion
White-labeling GoHighLevel takes 90 minutes for the first client, then 20–30 minutes per additional client. The result: a fully-branded CRM platform that looks and feels like your product, not GoHighLevel’s.
You’re now ready to:
- Hand off a custom-branded CRM to clients
- Charge $300–$500/month (10–20× markup on your cost)
- Build recurring revenue ($1,000–$3,000+/month with 5–10 clients)
- Offer a premium alternative to HubSpot (60% cheaper, more features)
Next steps:
- Complete DNS setup and test at your custom domain
- Create 3–5 reusable automation templates
- Onboard your first client
- Measure time-to-value (how fast they start seeing ROI)
- Refine your process and scale
Get Started
Start your GoHighLevel Unlimited trial here (14-day free trial, no credit card required). Set up white-labeling and onboard your first client this week.
━━━━━━━━━━━━━━━━━━━━━━━━━━━━━━━━━━━━━━━━━━━━━━━━━━━━━━━━━━ Built by agricidaniel - Join the AI Marketing Hub community 🆓 Free → https://www.skool.com/ai-marketing-hub ⚡ Pro → https://www.skool.com/ai-marketing-hub-pro ━━━━━━━━━━━━━━━━━━━━━━━━━━━━━━━━━━━━━━━━━━━━━━━━━━━━━━━━━━