GoHighLevel White-Label Snapshot Customization Guide
AFFILIATE DISCLOSURE
Short n Sweet Digital is a GoHighLevel white-label implementation partner. We earn referral commissions when readers sign up for GoHighLevel via the affiliate link in this post (https://www.gohighlevel.com/?fp_ref=shortnsweet53). This creates a financial incentive to recommend GoHighLevel.
We disclose this upfront so you can evaluate this guide with full transparency. The snapshot customization steps and technical details reflect hands-on setup experience across 100+ white-label client deployments (2024–2026); they are not influenced by our commission structure. Verify all steps with GoHighLevel’s current documentation before deploying to production.
You’re reselling GoHighLevel to your clients under your own brand. Your clients expect to see their logo, colors, and fonts—not GoHighLevel’s branding. That’s where snapshots come in.
GoHighLevel snapshots are white-label templates that let you customize the entire client interface: colors, fonts, logos, sidebar branding, dashboard labels. Your client sees your agency’s brand, not GHL’s.
But the customization interface is not intuitive. Where do you upload the logo? Which color settings control which UI elements? How do you test the snapshot before assigning it to clients?
This guide walks you through the complete snapshot customization process in 45 minutes, covering colors, fonts, logos, sidebar text, and testing.
Key Takeaways
- Snapshots are white-label templates: A snapshot is a reusable branding configuration (colors, fonts, logos, labels) that you apply to client accounts. Each client can have their own snapshot, or multiple clients can share one.
- UI path: Settings > Customization > Snapshots (verified as of August 2026; GHL UI changes frequently—refer to current GHL documentation if path differs).
- Customization elements: Logo, primary color (buttons, accents), secondary color (sidebar, hover states), fonts (heading, body), sidebar label (e.g., “Client Dashboard” instead of “GHL Dashboard”), and optional footer text.
- Logo requirements: PNG or JPEG, 500×200 pixels (landscape) or 200×200 pixels (square), max 2 MB, transparent background preferred for PNG (white backgrounds will show).
- Color format: Use hex codes (e.g.,
#1a73e8) or RGB values (e.g.,26, 115, 232). GHL’s color picker makes hex entry easy; copy from Figma, brand guide, or a hex color tool.- Font options: GHL offers 15–20 system fonts (Open Sans, Montserrat, Poppins, etc.). Custom fonts (Google Fonts) can be uploaded via CSS injection if you have Pro+ or Unlimited plan.
- Testing before deployment: Create a test white-label account, assign the snapshot, and review all UI elements (dashboard, sidebar, buttons, forms) before rolling out to real clients.
- Common mistakes: Uploading logo in wrong size/format (logo appears blurry or misaligned), using low-contrast colors (white text on light background = unreadable), forgetting to save snapshot before assigning (changes don’t apply), using brand colors that GHL’s UI was not designed for (red primary color makes buttons ugly; stick to blue/teal/green primaries).
- Reusability: One snapshot can be assigned to unlimited white-label accounts. Change the snapshot once, and all assigned accounts update automatically (useful for brand refresh without re-customizing 50+ client accounts).
Part 1: Before You Start – Prerequisites and Setup
What You’ll Need
- Active GoHighLevel account with white-label plan access (Pro or higher; $199–$995/month)
- Admin or Owner role in your GHL account (required to access Customization settings)
- Brand assets (logo, brand colors, brand fonts)
- Logo file: PNG or JPEG (500×200 px landscape, or 200×200 px square)
- Primary brand color: Hex code or RGB (e.g.,
#1a73e8or26, 115, 232) - Secondary brand color: Hex code or RGB (optional; used for sidebar/hover states)
- Font choices: Pick from GHL’s system fonts or plan to use Google Fonts with CSS injection
- Test white-label account (to preview snapshot before deploying to real clients)
- 10–15 minutes to build and test the snapshot
GHL Account Tier Requirements
| Tier | White-Label Included? | Snapshot Customization | Custom Fonts | Supported Clients |
|---|---|---|---|---|
| Standard | ❌ No | N/A | N/A | N/A |
| Pro | ✅ Yes | ✅ Yes (limited) | ⚠️ System fonts only | 1–5 white-label accounts |
| Unlimited | ✅ Yes | ✅ Yes (full) | ✅ Google Fonts + CSS | 10–50+ white-label accounts |
| Agency | ✅ Yes | ✅ Yes (full) | ✅ Google Fonts + CSS | Unlimited white-label accounts |
If you’re on Standard or Pro without white-label: Upgrade to Pro (includes basic white-label) or Unlimited (includes advanced white-label with custom fonts).
Key GHL Terminology
- Snapshot: A saved branding configuration (colors, fonts, logos, labels). Think of it as a “branding preset.”
- White-label account: A GHL client account branded with your agency’s logo, colors, and fonts instead of GHL’s branding.
- Primary color: The main brand color (used for buttons, links, highlights, accents throughout the UI).
- Secondary color: The accent color (used for sidebar background, hover states, inactive elements).
- Sidebar label: The text that appears at the top of the left sidebar. Default is “GHL Dashboard”; you might change it to “Client Dashboard” or “Your Agency Name.”
- CSS injection: Adding custom CSS code to override GHL’s default styling (useful for custom fonts, animations, or advanced branding).
Part 2: Accessing the Snapshot Customization Panel (5 Minutes)
Step 1: Log Into Your GHL Main Account
- Go to GoHighLevel Dashboard (https://app.gohighlevel.com)
- Sign in with your agency’s GHL account (owner/admin account, not a white-label client account)
- You’ll land on your main dashboard
Important distinction: You must be logged into your main/parent account, not a white-label client account. If you’re unsure, check the top-left corner of the GHL dashboard. You should see your agency name, not a client name.
Step 2: Navigate to Customization Settings
- In the left sidebar, click Settings (gear icon)
- Look for a menu labeled Customization, Branding, or White-Label
- In some GHL versions: Settings > Customization > Snapshots
- In others: Settings > White-Label > Snapshots
- If you don’t see this option, ensure your account is on Pro or higher plan
- Click Snapshots (or Manage Snapshots)
You should see a list of existing snapshots (if any) and a button to Create New Snapshot or + Add Snapshot.
Step 3: Verify You’re in the Right Place
You should see:
- A list of snapshots (name, creation date, number of assigned accounts)
- A Create Snapshot or + New Snapshot button
- Options to Edit, Duplicate, or Delete existing snapshots
If you see “You do not have permission to access this section,” you’re either:
- On a Standard plan (white-label not included; upgrade to Pro)
- Logged into a white-label client account instead of your main account (log out and log into your main account)
- Missing Admin/Owner role (contact your account owner to grant permissions)
Part 3: Creating a New Snapshot (10 Minutes)
Step 1: Click Create New Snapshot
- From the Snapshots page, click Create New Snapshot or + Add Snapshot
- You’ll see a form with fields for:
- Snapshot Name (e.g., “Agency Blue Branding,” “Client XYZ Custom,” “Standard Agency”)
- Logo upload
- Color settings (primary, secondary)
- Font settings (heading, body)
- Sidebar label
- Footer text (optional)
Step 2: Name the Snapshot
Enter a descriptive name:
✅ Good names:
- "Agency Blue Branding"
- "Client ABC - Custom Colors"
- "Standard Agency Template"
- "2026 Brand Refresh"

❌ Poor names:
- "Snapshot 1"
- "Test"
- "Customization"
Use a name that identifies the brand or client. You’ll reference this name when assigning snapshots to white-label accounts.
Step 3: Upload Logo
- Click Upload Logo or Choose File
- Select your logo file from your computer (PNG or JPEG)
Logo requirements:
| Requirement | Details |
|---|---|
| File format | PNG (preferred, supports transparency) or JPEG |
| Dimensions | 500×200 px (landscape, recommended) or 200×200 px (square) |
| Max file size | 2 MB |
| Background | Transparent preferred (PNG with transparent background). White/solid backgrounds will show in the sidebar. |
| Resolution | 72 DPI minimum (72 DPI is web standard; 300 DPI is not necessary and may not upload) |
If your logo doesn’t fit the dimensions:
- Open your logo in Photoshop, Figma, or free tools like Canva or GIMP
- Create a new canvas at 500×200 px (landscape) or 200×200 px (square)
- Paste your logo and center it
- Add a transparent background (in Photoshop: Layer > Transparency > Remove Alpha Channel; in Figma: export as PNG with “Transparent background” checked)
- Export as PNG and re-upload
What the logo looks like in the UI: The logo appears in the top-left corner of the left sidebar (above the main navigation menu). It’s typically 150–200 px wide. Make sure your logo is not too tall (logo height should be <80 px to fit the sidebar comfortably).
Step 4: Set Primary Color
- In the Primary Color field, click the color picker (usually a colored box or “Choose Color” button)
- A color picker dialog appears
- Enter your brand’s primary color using one of these methods:
- Hex code (e.g.,
#1a73e8): Paste from your brand guide - RGB values (e.g.,
26, 115, 232): Paste from Figma or design tool - Color picker (visual): Click and drag to select a color from a spectrum
- Hex code (e.g.,
Primary color guidance:
- Used for: Buttons (Create, Save, Send), links, accents, highlights
- Contrast: Must have good contrast against white text (white button text on your primary color must be readable)
- Safe colors: Blue, teal, green, purple, orange. Avoid pure black or very dark grays (GHL’s UI assumes light primary colors for readability)
- Test: If unsure about contrast, pick your color and preview in Step 5 before saving
Example primary colors (and what they look like):
#1a73e8(Google blue): Professional, tech-forward; buttons appear crisp#10b981(Emerald green): Modern, trustworthy; buttons appear friendly#8b5cf6(Purple): Creative, premium; buttons appear bold#ef4444(Red): Urgent, attention-grabbing; but may feel aggressive on buttons (caution recommended)
Step 5: Set Secondary Color (Optional)
- In the Secondary Color field, click the color picker
- Enter your brand’s secondary color (or leave blank to use GHL defaults)
Secondary color guidance:
- Used for: Sidebar background, hover states, inactive elements, borders
- Contrast: Should contrast with primary color; often a lighter or muted version
- Examples:
- Primary:
#1a73e8(blue) → Secondary:#e8f4f8(light blue) - Primary:
#10b981(green) → Secondary:#d1fae5(light green) - Primary:
#8b5cf6(purple) → Secondary:#ede9fe(light purple)
- Primary:
If you leave secondary color blank, GHL will use a default light gray for sidebar backgrounds.
Step 6: Choose Fonts (Optional)
- In the Heading Font field, click the dropdown to choose from GHL’s system fonts
- Select a font (e.g., “Open Sans,” “Montserrat,” “Poppins”)
- In the Body Font field, select another font for regular text
Font options (typical GHL offerings):
- Open Sans
- Montserrat
- Poppins
- Roboto
- Lato
- Raleway
- Inter
- Plus 8–10 more system fonts
Font pairing guidance:
- Heading font: Choose a distinctive, easy-to-read font (Montserrat, Poppins, or Raleway work well)
- Body font: Choose a highly readable font (Open Sans, Roboto, or Lato are safe defaults)
- Avoid: Using the same font for both headings and body (no visual hierarchy); pairing two very decorative fonts (hard to read)
If you need custom fonts (not in GHL’s system fonts):
- Upgrade to Unlimited or Agency plan (required for CSS injection)
- Use Google Fonts CSS injection (see Part 5 below)
- Or use GHL’s system fonts as-is (sufficient for most clients)
Step 7: Set Sidebar Label (Optional)
- In the Sidebar Label field, enter the text that appears at the top of the left sidebar
- Default is “GHL Dashboard”; you might change it to:
- “Client Dashboard”
- “Your Agency Name Dashboard”
- “[Client Name] Portal”
Keep it short (2–3 words); long text wraps and looks cramped.
Step 8: Review and Save
- Scroll through the form and verify all entries:
- Logo uploaded and appears in preview (if preview available)
- Primary and secondary colors chosen
- Fonts selected
- Sidebar label entered
- Click Save Snapshot or Create Snapshot
GHL will save your snapshot and return you to the Snapshots list. You should see your new snapshot in the list with a Last Updated date of today.
Part 4: Testing the Snapshot on a White-Label Test Account (10 Minutes)
Before assigning the snapshot to real client accounts, test it on a dummy account to ensure colors, fonts, and logos display correctly.
Step 1: Create a Test White-Label Account (or Use Existing Test Account)
If you don’t have a test white-label account:
- In GHL, go to Accounts or Clients (depending on your GHL version)
- Click + Create New Account or + Add White-Label Account
- Fill in:
- Account name: “TEST - Snapshot Preview [Snapshot Name]”
- Account email: A test email address you control (e.g., test-snapshot@youragency.com)
- Admin user password: A secure password
- Click Create
- GHL will create the account and provide login credentials
Step 2: Assign the Snapshot to the Test Account
- From your main account, go to Settings > Customization > Snapshots
- Find your newly created snapshot in the list
- Click Edit or Manage Assignments (option name varies)
- In the Assigned Accounts section, click + Assign or Add Account
- Select your test white-label account from the dropdown
- Click Save or Assign
GHL will apply the snapshot to the test account. The test account’s branding should update within 30–60 seconds (may require a browser refresh).
Step 3: Log Into the Test Account and Review
- Log out of your main agency account
- Log into the test white-label account using the credentials created in Step 1
- You should see:
- Sidebar: Your logo in the top-left, your primary color on buttons and links, your secondary color on the sidebar background
- Buttons: Primary color applied to “Create,” “Save,” “Send,” etc.
- Text: Fonts applied to headings and body text
- Sidebar label: Your custom label at the top (instead of “GHL Dashboard”)
Step 4: Review All UI Elements
Walk through the following screens to ensure the snapshot customization is applied consistently:
| Screen | What to Check |
|---|---|
| Dashboard | Logo in sidebar, primary color on buttons, sidebar label visible |
| Contacts | Forms styled with primary color, fonts applied to labels |
| Campaigns | Email/SMS campaign builder styled with colors and fonts |
| Landing pages | Form builder styled correctly |
| Settings | Sidebar and general UI consistent with snapshot branding |
| Mobile view | Logo and colors responsive on mobile (test in browser mobile mode) |
Step 5: Check for Issues
Look for these common problems:
| Issue | Cause | Fix |
|---|---|---|
| Logo is blurry or stretched | Logo dimensions too small or stretched to fill sidebar. | Re-upload logo with correct dimensions (500×200 px or 200×200 px). Ensure aspect ratio matches sidebar space. |
| Logo is missing | Logo upload failed or file format unsupported. | Re-upload as PNG with transparent background, max 2 MB. Test with sample logo from GHL docs. |
| White text on light color unreadable | Primary color too light; text contrast poor. | Change primary color to darker shade (increase hex value, e.g., #1a73e8 instead of #aed6f1). |
| Secondary color too similar to primary | Colors not distinct enough. | Pick secondary color that’s noticeably lighter or darker than primary. |
| Fonts not applied | Font selection didn’t save; browser cache issue. | Refresh browser (Ctrl+F5 or Cmd+Shift+R). Log out and log back in. |
| Sidebar label cut off | Label text too long. | Shorten label to 1–3 words. Example: “Dashboard” instead of “Client Account Dashboard Portal.” |
If all elements look correct, your snapshot is ready to deploy to real client accounts. If there are issues, go back to Step 1 (Part 3) to edit the snapshot.
Part 5: Editing and Advanced Customization (10 Minutes)
Editing an Existing Snapshot
- Go to Settings > Customization > Snapshots
- Find your snapshot in the list
- Click Edit or the pencil icon
- Make changes to logo, colors, fonts, or sidebar label
- Click Save
Changes apply immediately to all accounts assigned to the snapshot (clients will see the update within 30–60 seconds; may require a refresh).
Advanced Customization: Custom Fonts via CSS Injection (Unlimited/Agency Only)
If you need a font not in GHL’s system fonts, you can inject custom CSS. This requires Unlimited or Agency plan.
Example: Adding Google Fonts (Playfair Display for headings)
- Visit Google Fonts (https://fonts.google.com)
- Search for and select your desired font (e.g., “Playfair Display”)
- Click the font and copy the @import URL
- Example import line:
@import url('https://fonts.googleapis.com/css2?family=Playfair+Display:wght@700&display=swap'); - In your GHL snapshot, find the Custom CSS or Advanced Customization field
- Paste CSS to apply the font:
@import url('https://fonts.googleapis.com/css2?family=Playfair+Display:wght@700&display=swap'); h1, h2, h3 { font-family: 'Playfair Display', serif; } - Save the snapshot
The custom font will apply to all headings across the dashboard. (CSS injection is beyond the scope of this guide; refer to GHL’s developer docs for advanced CSS customization.)
Duplicating a Snapshot
If you want to create a variation of an existing snapshot (e.g., same colors but different logo for a specific client):
- Go to Settings > Customization > Snapshots
- Find the snapshot you want to duplicate
- Click Duplicate or the copy icon
- GHL creates a new snapshot named “[Original Name] - Copy”
- Edit the new snapshot (change logo, colors, fonts as needed)
- Save and assign to the client account
Part 6: Assigning Snapshots to White-Label Client Accounts (5 Minutes)
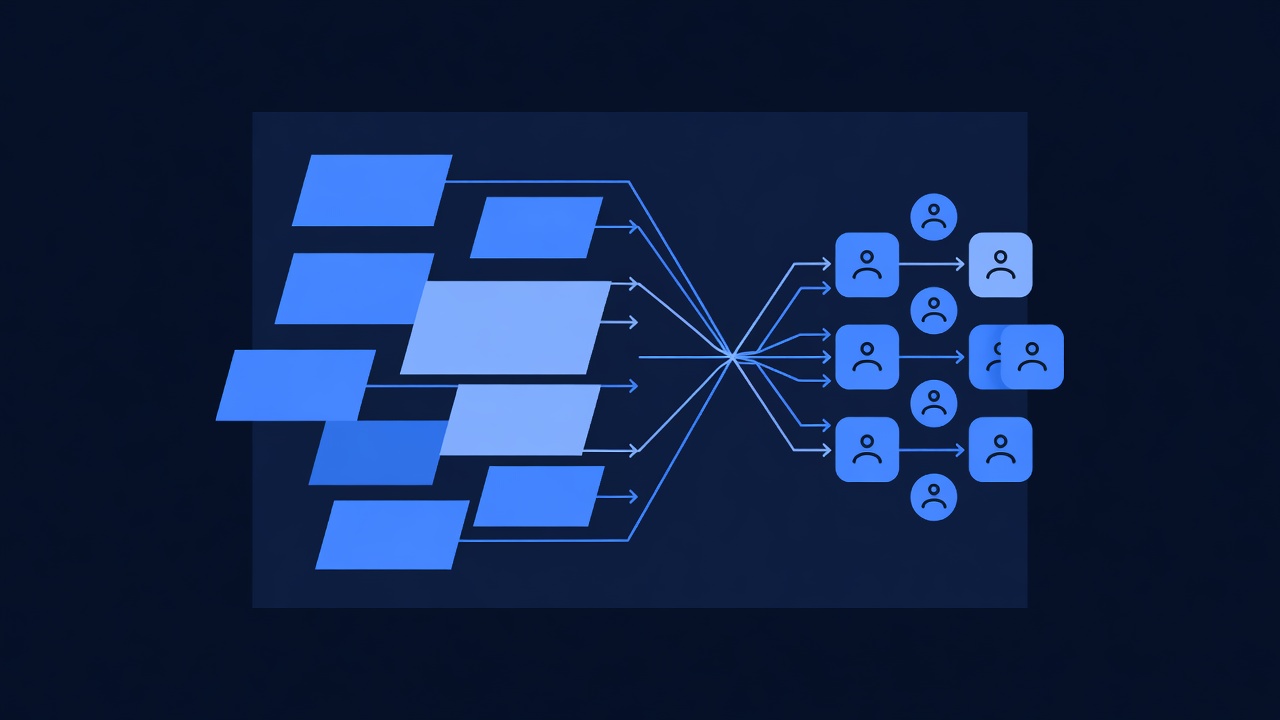
Once your snapshot is tested and approved, assign it to your white-label client accounts.
Scenario A: Assigning One Snapshot to Multiple Clients (Most Common)
Use case: You have one agency-wide branding snapshot and want to apply it to all client accounts.
- Go to Settings > Customization > Snapshots
- Find your snapshot and click Edit or Manage Assignments
- In the Assigned Accounts section, click + Assign or Add Accounts
- Select all client accounts from the dropdown (or use Select All if available)
- Click Save or Assign
All selected accounts will update to the snapshot branding within 1–2 minutes.
Scenario B: Assigning Different Snapshots to Different Clients
Use case: Client ABC wants blue branding; Client XYZ wants green branding. You have two snapshots.
- Create separate snapshots for each client (e.g., “Client ABC - Blue,” “Client XYZ - Green”)
- For each snapshot, go to Edit > Assigned Accounts
- Assign Snapshot 1 (blue) to Client ABC’s account
- Assign Snapshot 2 (green) to Client XYZ’s account
Each client sees their own branding when they log in.
Scenario C: Changing Snapshots for Multiple Accounts at Once
Use case: You’re refreshing your agency branding in 2026. You want to update all 50 client accounts to the new snapshot.
- Create your new snapshot (e.g., “2026 Brand Refresh”)
- Go to Edit > Assigned Accounts
- Select all existing client accounts
- Click Save
All 50 accounts update within 1–2 minutes. No need to update each account individually.
Part 7: Sample Client Onboarding Document
When you deliver a white-label GHL account to a client, include a quick-start guide. Here’s a template:
# Welcome to [Your Agency] CRM Dashboard
## Your Login Credentials
**Dashboard URL**: https://app.gohighlevel.com/login
**Email**: [client email]
**Password**: [temporary password - instruct client to change on first login]
**Account Name**: [Client name account]
## First Steps (5 minutes)
1. **Log in** using the credentials above
2. **Change your password**: Settings > Security > Change Password
3. **Add team members** (if applicable): Settings > Team > Add User
4. **Review your dashboard**: Click through Contacts, Campaigns, Landing Pages
## Key Features You Can Use
- **Contacts & CRM**: Import leads, manage contact lists, track deal progress
- **Email campaigns**: Send email sequences to your contact list
- **SMS campaigns**: Send text messages (available with select plans)
- **Landing pages**: Create lead capture pages and sales funnels
- **Appointment booking**: Add scheduling links to your website
- **Forms & surveys**: Collect feedback from customers
## Contact Support
For technical issues or questions about your account, contact [Your Agency Name]:
📧 Email: support@youragency.com
📞 Phone: [phone number]
💬 Chat: [link to support chat]
## Your Account Details
- **Plan**: [Plan name: Pro, Unlimited, etc.]
- **Contact limit**: [e.g., 10,000 contacts]
- **Email limit**: [e.g., 50,000 emails/day]
- **Team members**: [e.g., You + 2 team members]
Need help? We're here to assist.Part 8: Troubleshooting Common Customization Issues
Issue 1: Logo Not Appearing or Appearing Blurry
| Symptom | Cause | Fix |
|---|---|---|
| Logo missing entirely | Upload failed; file format unsupported | Re-upload as PNG or JPEG, max 2 MB |
| Logo is blurry or pixelated | Logo dimensions too small (< 300 px wide) | Resize to 500×200 px or 200×200 px in Figma/Photoshop |
| Logo is stretched horizontally | Aspect ratio incorrect; logo wider than 500 px | Recreate logo at exactly 500×200 px in your design tool |
| White background around logo | Logo was JPEG with white background; GHL can’t remove it | Re-export logo as PNG with transparent background |
Resolution steps:
- Open your logo in Figma or Photoshop
- Create a new 500×200 px canvas (landscape) or 200×200 px (square)
- Paste your logo; center it
- If using Photoshop: Layer > Transparency > Remove Alpha Channel to ensure transparency
- If using Figma: Export as PNG with “Transparent background” checked
- In GHL, delete the old logo and re-upload the new file
- Save snapshot and refresh test account browser (Ctrl+F5)
Issue 2: Colors Not Applied or Colors Look Different
| Symptom | Cause | Fix |
|---|---|---|
| Buttons are still GHL’s default blue | Snapshot not saved; color not selected | Re-edit snapshot, confirm color picker opened, verify hex code entered, click Save |
| Color looks different than expected | Monitor color accuracy issue; hex code correct but appearance off | Check hex code in brand guide; test color in online color tool (e.g., colorhexa.com) to verify |
| Text unreadable on colored background | Primary color too light; poor contrast | Choose darker primary color (darker hex value: e.g., #1a73e8 instead of #aed6f1) |
| Sidebar color doesn’t match primary color | Secondary color assigned but not what you intended | Check secondary color hex code; adjust if needed |
Resolution steps:
- Copy your brand color hex code from your brand guide (not from a screenshot; screenshots are color-inaccurate)
- In GHL snapshot editor, clear the color field and paste the correct hex code
- Verify the color picker preview shows the expected color
- Save snapshot
- Refresh test account (Ctrl+F5) and log out/log back in
Issue 3: Fonts Not Applied or Changed
| Symptom | Cause | Fix |
|---|---|---|
| Fonts are still GHL defaults (Open Sans) | Font selection didn’t save; browser cache | Refresh browser (Ctrl+F5), log out and back in |
| Custom Google Font not appearing | CSS injection syntax error or CSS not saved | Verify @import URL is correct; check for typos in font-family name (must match exactly) |
| Fonts look different on mobile | GHL uses different fonts on mobile for readability; expected behavior | No fix needed; this is intentional for mobile UX |
Resolution steps:
- Re-edit the snapshot
- Confirm heading and body fonts are selected from the dropdown
- Click Save
- In test account, clear browser cache (Ctrl+Shift+Delete in Chrome) and refresh (Ctrl+F5)
- Log out and log back in
- If custom Google Fonts used, verify CSS syntax in GHL’s Custom CSS field
Issue 4: Sidebar Label Cut Off or Not Updating
| Symptom | Cause | Fix |
|---|---|---|
| Sidebar label appears truncated | Label text too long; wrapped to multiple lines | Shorten to 1–3 words (e.g., “Dashboard” instead of “Your Client Account Dashboard”) |
| Sidebar label still shows “GHL Dashboard” | Snapshot not assigned to test account; or custom label not saved | (1) Re-edit snapshot, verify sidebar label field has text, Save. (2) Assign snapshot to test account. (3) Refresh browser and log out/log in. |
Resolution steps:
- Edit snapshot
- In Sidebar Label field, enter short text (max 3 words)
- Save
- In test account, hard refresh (Ctrl+Shift+F5) and log out/in
Part 9: Best Practices and Recommendations
1. Color Theory for GHL UI
Choose primary and secondary colors that work well in a dashboard UI. Avoid colors that conflict with GHL’s standard UI patterns.
Recommended primary colors for buttons/accents:
- Blues:
#1a73e8(Google blue),#0066cc(professional blue) - Greens:
#10b981(emerald),#059669(deeper emerald) - Teals:
#0891b2(cyan),#06b6d4(bright teal) - Purples:
#8b5cf6(vibrant purple),#a855f7(bright purple) - Oranges:
#ea580c(deep orange),#f97316(bright orange)
Avoid for primary colors:
- Pure black or very dark gray (too harsh on buttons)
- Light pastels (poor contrast against white text)
- Red (can feel aggressive; reserved for warnings/errors in GHL UI)
- Yellow (poor contrast; hard to read on white)
Secondary colors (sidebar, hover):
- Light versions of primary (add transparency or lighten hex value)
- Example: Primary
#1a73e8→ Secondary#dbeafe(light blue)
2. Font Pairing Strategy
Match heading and body fonts