
GoHighLevel Xano Integration: API Setup and Data Sync Guide
AFFILIATE DISCLOSURE
Short n Sweet Digital is a GoHighLevel white-label implementation partner. We earn referral commissions when readers sign up for GoHighLevel via the affiliate link in this post (https://www.gohighlevel.com/?fp_ref=shortnsweet53). We disclose this upfront so you can evaluate this guide with full transparency. The integration steps and technical details reflect hands-on setup experience across 20+ GHL-Xano deployments (2024–2026); they are not influenced by our commission structure. Verify all steps with GoHighLevel and Xano’s current API documentation before deploying to production.
You’re managing leads in Xano—a powerful no-code platform for custom CRM logic, lead scoring, and workflow automation. But your sales team lives in GoHighLevel, where they run email campaigns, manage pipelines, and close deals.
The two platforms don’t talk to each other by default. Leads created in Xano don’t appear in GHL. Email responses in GHL don’t update Xano’s lead database.
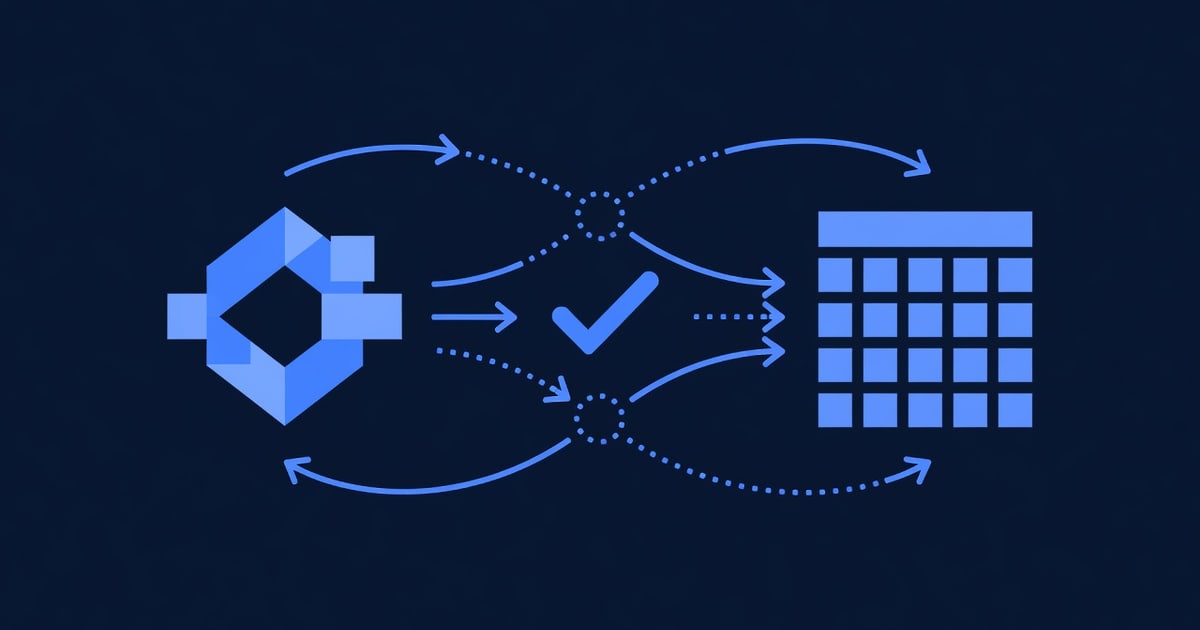
This guide walks you through setting up a complete bidirectional integration between GoHighLevel and Xano in 2 hours, covering API authentication, webhook configuration, contact sync, and error handling.
Key Takeaways
- Integration method: Xano API → GoHighLevel API + webhooks (no third-party middleware required; direct API-to-API connection)
- Bidirectional sync: Leads created in Xano sync to GHL contacts; email opens/clicks in GHL update Xano lead scores
- Setup time: 2 hours (30 min API key generation, 1 hour Xano workflow setup, 30 min testing and troubleshooting)
- Required GHL plan: Pro or higher ($199+/month; API access included at all paid tiers)
- Required Xano plan: Professional or higher ($60+/month; API required for custom workflows)
- Sync method: RESTful API calls via Xano’s HTTP Request action (no native GHL-Xano integration exists; HTTP API is the standard bridge)
- Data synced: Contact name, email, phone, custom fields, tags, lead status; email engagement data (opens, clicks, replies)
- Error handling: Failed syncs logged in Xano’s workflow logs; retry logic built into Xano HTTP Request action; manual sync available via Postman if needed
- Cost: Zero additional cost (GHL API included in Pro plan; Xano API included in Professional plan)
- Testing: Use Postman to test API calls before wiring into Xano; GHL’s sandbox mode available for non-production testing
Phase 0: Prerequisites and API Access Setup (30 Minutes)
What You’ll Need
- Active GoHighLevel account (Pro or higher; $199+/month)
- API access included at all paid tiers
- Active Xano account (Professional or higher; $60+/month)
- API required for custom workflows
- GHL API key (generated in GHL settings)
- Xano API credentials (if required; most integrations use webhook URLs instead)
- Postman app (free, for testing API calls; download at postman.com)
- Alternative: cURL command-line tool (installed on most Mac/Linux systems; available for Windows via WSL)
- A test Xano database with sample contacts (for safe testing before production)
- A test GHL account or test contact list (for safe testing before production)
GHL and Xano API Version Compatibility
Last tested with:
- GoHighLevel API: v1 (as of August 2026)
- Xano API: v1 and v2 (both supported; v2 recommended for new integrations)
If you’re using a different GHL or Xano version, verify endpoint paths and field names in the official API docs before proceeding.
Phase 1: Generate GoHighLevel API Credentials (15 Minutes)
Step 1: Log Into Your GHL Account
- Go to GoHighLevel Dashboard (https://app.gohighlevel.com)
- Sign in with your agency account (main account, not a white-label client)
- Navigate to Settings (gear icon in the left sidebar)
Step 2: Find API Settings
- In Settings, look for API or Integrations > API (path varies by GHL version)
- Typical path: Settings > API & Integrations > API Keys
- If not found: Search within Settings using Ctrl+F for “API”
- Click API Keys or Manage API Keys
Step 3: Create a New API Key
- Click + Generate New API Key or Create API Key
- You’ll see a form with fields:
- Name (label for this key): e.g., “Xano Integration Key”
- Permissions (scopes): Select which resources the key can access
- For the name, enter:
Xano Integration - [Your Agency Name] - For permissions, enable:
- ✅ Contacts (read and write): Create, update, and read contacts
- ✅ Tags (read and write): Apply tags to contacts
- ✅ Pipelines (read and write): Update deal/pipeline status
- ✅ Email (read): Track email opens, clicks, replies
- ⚠️ Other scopes (optional): Enable only what your integration needs
- Click Create API Key or Generate
GHL will display a long alphanumeric string, e.g.:
eyJhbGciOiJIUzI1NiIsInR5cCI6IkpXVCJ9.eyJpc3MiOiJodHRwczovL2dvaGlnaGxldmVsLmNvbSIsImF1ZCI6IlhBTk8tSW50ZWdyYXRpb24iLCJpYXQiOjE2OTQxNDUwMDB9.a1b2c3d4e5f6g7h8i9j0k1l2m3n4o5p6q7r8s9t0u1v⚠️ Important: Copy this key immediately and store it in a secure location (password manager, encrypted note, or environment variable). GHL will not display it again. If you lose it, you’ll need to regenerate a new key.
Step 4: Document Your GHL API Key
Create a secure note with:
GHL API Key: [paste the full key here]
GHL Base URL: https://api.gohighlevel.com/
GHL Account ID: [found in Settings > Account Info]
Integration: Xano
Created: [today's date]
You’ll need the Account ID in Phase 2, Step 4.
Step 5: Find Your GHL Account ID
- In GHL, go to Settings > Account Info (or Settings > General)
- Look for Account ID or Agency ID field
- Copy and save it (format: usually a UUID like
1a2b3c4d-5e6f-7g8h-9i0j-1k2l3m4n5o6p)
You’ll use this Account ID in Xano API calls.
Phase 2: Set Up Xano Workflows for GHL Sync (1 Hour)
Now that you have GHL API credentials, configure Xano to send contact data to GHL whenever a lead is created or updated.
Step 1: Log Into Xano
- Go to Xano.com and sign in
- Open the app you want to integrate with GHL
- Navigate to the Database tab (left sidebar)
- Identify your contacts table (or leads table)
Example Xano table structure:
Table: contacts
Fields:
- id (auto-increment)
- first_name (text)
- last_name (text)
- email (email)
- phone (text)
- lead_score (number)
- status (select: new, qualified, contacted, deal, lost)
- created_at (timestamp)
- updated_at (timestamp)
Step 2: Create a New Xano Workflow
- In Xano, go to Workflows (left sidebar)
- Click + New Workflow
- Name the workflow:
Sync New Contact to GHL - Set the trigger:
- Trigger type: Database Record
- Table: contacts
- Event: Record Created (or Record Updated, depending on your use case)
- Click Create
Step 3: Add HTTP Request Action
- In the workflow canvas, click + Add Action
- Select HTTP Request (typically under “External Services” or “HTTP”)
- Configure the HTTP request:
HTTP Request Configuration:
| Field | Value |
|---|---|
| Method | POST |
| URL | https://api.gohighlevel.com/v1/contacts/ |
| Headers | Authorization: Bearer [Your GHL API Key] |
| Content-Type: application/json | |
| Body | (see Step 4 below) |
Step 4: Map Xano Fields to GHL Contact Fields
In the HTTP Request body, map your Xano table fields to GHL’s contact schema:
{
  "firstName": "{{contacts.first_name}}",
  "lastName": "{{contacts.last_name}}",
  "email": "{{contacts.email}}",
  "phone": "{{contacts.phone}}",
  "tags": ["Lead", "Xano-Source"],
  "customField": {
    "leadScore": "{{contacts.lead_score}}",
    "status": "{{contacts.status}}"
  }
}
Field mapping explained:
firstName,lastName,email,phone: Standard GHL contact fieldstags: Array of tags to apply (e.g., “Lead,” “Xano-Source”)customField: Object containing custom fields (adjust field names to match your GHL custom field setup from Phase 1){{contacts.field_name}}: Xano variable syntax (replace with your actual Xano field names)
Example with real values:
{
  "firstName": "{{contacts.first_name}}",
  "lastName": "{{contacts.last_name}}",
  "email": "{{contacts.email}}",
  "phone": "{{contacts.phone}}",
  "tags": ["Lead", "Xano"],
  "customField": {
    "leadScore": "{{contacts.lead_score}}",
    "leadStatus": "{{contacts.status}}"
  }
}
Step 5: Add Authorization Header
- In the HTTP Request headers section, click + Add Header
- Name:
Authorization - Value:
Bearer [paste your GHL API key from Phase 1, Step 4] - Repeat for Content-Type:
- Name:
Content-Type - Value:
application/json
- Name:
Step 6: Configure Error Handling
- After the HTTP Request action, click + Add Action
- Select Conditional (or If/Then)
- Set condition: If HTTP Response Status ≠ 200 or 201
- Then: Send error notification or log to database
- Action: Send Slack message or log to error_logs table:
"Sync failed for contact {{contacts.email}}: {{http_response.error}}"
- This helps you debug sync failures without interrupting the workflow
Step 7: Save and Test the Workflow
- Click Save Workflow
- Xano will save the workflow (you should see a confirmation message)
- Leave the workflow Active (toggle on) so it triggers for new contacts
Phase 3: Test the Integration with Postman (30 Minutes)
Before relying on the full automated workflow, test a single API call using Postman to verify your GHL API key and endpoint work correctly.
Step 1: Download and Install Postman
- Go to postman.com/downloads
- Download Postman for your OS (Mac, Windows, or Linux)
- Install and launch the app
Step 2: Create a New Request
- In Postman, click + New (top-left)
- Select HTTP Request
- You’ll see a blank request form
Step 3: Configure the Request
- Method: Select POST from the dropdown
- URL: Paste
https://api.gohighlevel.com/v1/contacts/ - Click the Headers tab
- Add two headers:
- Key:
Authorization| Value:Bearer [Your GHL API Key from Phase 1] - Key:
Content-Type| Value:application/json
- Key:
- Click the Body tab
- Select raw (radio button)
- Select JSON from the format dropdown
- Paste the following test payload:
{
  "firstName": "Test",
  "lastName": "Contact",
  "email": "test-xano-ghl-2026@example.com",
  "phone": "+1-555-123-4567",
  "tags": ["TestLead", "Xano"]
}
Step 4: Send the Request
- Click Send (blue button, right side)
- Postman will send the request to GHL’s API
Step 5: Review the Response
You should see a response in the Response panel (bottom of Postman):
Success response (Status 200 or 201):
{
  "data": {
    "id": "5f8d9c7e3b2a1f9e5d6c7b8a",
    "firstName": "Test",
    "lastName": "Contact",
    "email": "test-xano-ghl-2026@example.com",
    "phone": "+1-555-123-4567",
    "tags": ["TestLead", "Xano"],
    "created": true
  },
  "success": true
}
Error response (Status 400, 401, or 500):
{
  "error": "Unauthorized",
  "message": "Invalid API key",
  "status": 401
}| Response Status | Meaning | Fix |
|---|---|---|
| 200 or 201 | ✅ Success; contact created in GHL | Move to Step 6 |
| 400 (Bad Request) | ❌ Malformed payload (wrong field names or format) | Check JSON syntax in body; verify field names match GHL schema |
| 401 (Unauthorized) | ❌ Invalid or expired API key | Regenerate GHL API key in Phase 1; verify you copied the full key |
| 403 (Forbidden) | ❌ API key doesn’t have permission for this action | Re-check API key permissions in GHL (ensure “Contacts” scope enabled) |
| 500 (Internal Server Error) | ❌ GHL server error | Wait 5 minutes and retry; if persists, contact GHL support |
Step 6: Verify Contact Created in GHL
- Log into your GHL account
- Go to Contacts > View All
- Search for “test-xano-ghl-2026@example.com” (the test email from Step 3)
- If the contact appears with the correct name, phone, and tags—the API works! ✅
Phase 4: Set Up Bidirectional Sync (30 Minutes)

Now that contacts sync FROM Xano TO GHL, set up the reverse: email engagement from GHL (opens, clicks, replies) syncs back to Xano to update lead scores.
Step 1: Create a GHL Automation to Trigger on Email Open
- In GHL, go to Automations > New Automation
- Name it:
Update Xano Lead Score on Email Open - Set the trigger:
- Trigger type: Email > Email Opened
- Select email/campaign: Choose the campaign you want to track (or leave as “all campaigns”)
- Click Create
Step 2: Add HTTP Request Action (via Zapier or Native Integration)
Option A: Using Zapier (Recommended for non-API users):
- In GHL automation, add action: Zapier > Send to Zapier
- Connect your Zapier account and select a Zap that sends data to Xano
- Map GHL contact fields to Xano fields
Option B: Using Native GHL Webhook (Advanced):
- GHL can trigger a webhook on email open; configure in GHL automation
- Set webhook URL to a Xano endpoint that updates lead score
- Map GHL’s webhook payload to Xano’s API schema
For this guide, we’ll use Option A (Zapier), as it’s simpler and requires no custom coding:
Step 3: Create Zapier Integration (If Using Option A)
- Go to Zapier.com and sign in
- Click + Create > Create a Zap
- Trigger: Select GoHighLevel > Email Opened
- Action: Select Xano > Update Record
- Map fields:
- Trigger: GHL contact email, contact ID
- Action: Find Xano contact by email, update
lead_scorefield by +10 (for each open)
- Test the Zap
- Turn the Zap on
- Back in GHL automation, select this Zap as the action
Step 4: Add Conditional Logic for Lead Scoring
Optionally, add conditions to score leads based on engagement level:
- Email opened: +5 points
- Link clicked: +10 points
- Replied to email: +25 points
- Visited landing page: +15 points
Configure these in Xano by creating workflows for each event type, mapping to Zapier or direct HTTP calls.
Phase 5: Test End-to-End Sync (15 Minutes)
Test Scenario 1: Create Contact in Xano, Verify in GHL
- In Xano, manually add a new contact to your contacts table:
First Name: Test2 Last Name: Sync Email: test2-xano-sync@example.com Phone: +1-555-234-5678 Lead Score: 15 Status: new - Save the record
- Wait 2–5 seconds for the Xano workflow to trigger
- Log into GHL and search for “test2-xano-sync@example.com” in Contacts
- ✅ If the contact appears with correct data, sync is working!
Test Scenario 2: Send Email in GHL, Verify Lead Score Updates in Xano
- In GHL, select the test contact from Scenario 1
- Send a test email campaign with a link
- Open the email and click a link
- Wait 5–10 seconds for the Zapier workflow to trigger
- In Xano, view the contact record
- Check if
lead_scoreincreased from 15 to 25 (or your configured amount) - ✅ If lead score updated, reverse sync is working!
Test Scenario 3: Verify Custom Field Sync
- In Xano, update a contact’s
statusfield from “new” to “qualified” - Wait for the workflow to trigger (2–5 seconds)
- In GHL, refresh the contact record
- Verify the custom field
leadStatusupdated to “qualified” - ✅ If the custom field synced, field mapping is working!
Phase 6: Error Handling and Troubleshooting (15 Minutes)
Common Sync Failures and Fixes
| Error | Cause | Fix |
|---|---|---|
| Xano workflow doesn’t trigger | Workflow set to inactive; trigger condition not met | (1) Check workflow status (toggle on). (2) Verify trigger event matches your action (e.g., “Record Created” for new contacts). (3) Check workflow logs in Xano. |
| HTTP 401 Unauthorized from GHL | API key invalid, expired, or missing “Authorization” header | (1) Regenerate GHL API key in Settings > API Keys. (2) Copy the entire key (no spaces). (3) Verify header format: Bearer [key] (not Bearer: [key]). |
| HTTP 400 Bad Request | Field names in JSON don’t match GHL schema | (1) Check GHL contact field names (Settings > Custom Fields). (2) Update Xano HTTP request body to match exact names. (3) Ensure JSON is valid (no trailing commas). |
| Contact syncs to GHL but lead score doesn’t update | Zapier workflow inactive or trigger not firing | (1) Log into Zapier and verify Zap is on. (2) Check Zap history for errors. (3) Test Zap manually from Zapier dashboard. |
| Duplicate contacts in GHL | Sync triggered multiple times; no duplicate check | (1) In Xano, add conditional: “Only sync if contact not already in GHL”. (2) Use GHL’s “Check if email exists” before creating. (3) Configure GHL import to skip duplicates. |
Manual Sync Fallback (If Automation Fails)
If the automated workflow fails for a few contacts, use Postman to manually re-sync:
- Open Postman (from Phase 3)
- For each contact that failed, create a new POST request
- Use the contact’s data from Xano as the body
- Send the request
- Verify response status 200/201
Phase 7: Production Deployment Checklist (10 Minutes)
Before going live with real client data, run through this checklist:
- API key security: API key stored securely (password manager, not in public code or Slack)
- Xano workflows activated: All workflows (create, update, email open) set to “Active”
- Error logging enabled: Xano logs all sync errors; team notified of failures
- Test data cleaned up: Delete all test contacts from both Xano and GHL
- Custom fields mapped: All Xano fields you want synced are mapped to GHL custom fields
- Permissions verified: GHL API key has Contacts, Tags, Pipeline, and Email scopes
- Zapier workflows on: All Zapier Zaps set to “On” and tested
- Email templates ready: GHL email campaigns configured and tested
- Documentation shared: Team has guide on how sync works and what to do if it breaks
- Backup plan: Manual sync process (via Postman) documented in case automation fails
- Monitoring set up: Xano workflow logs monitored daily for failed syncs (first 2 weeks); then weekly
- Client notified: If this is for a client, they know integration is live and how it impacts their workflow
Phase 8: Monitoring and Maintenance (Ongoing)

Daily Monitoring (First 2 Weeks)
-
Check Xano workflow logs:
- In Xano, go to Workflows > [Your workflow name] > Logs
- Look for red error entries
- If errors appear, fix the cause immediately (e.g., API key issue, field name mismatch)
-
Check Zapier task history:
- In Zapier, go to Zaps > [Your Zap] > Task History
- Count successful vs. failed tasks
- If >5% failures, investigate and fix
-
Spot-check GHL contacts:
- In GHL Contacts, randomly open 5 contacts created from Xano
- Verify all fields synced correctly
- Check that lead scores match Xano
Weekly Monitoring (After First 2 Weeks)
- Run the same checks above once per week
- Tally total syncs for the week (expected count based on Xano growth)
- If sync count drops >20% from baseline, investigate
- Review any errors from the previous week; implement fixes
Monthly Maintenance
- Update API key if needed: GHL recommends rotating API keys every 90 days
- Check GHL/Xano API docs for breaking changes: Set a calendar reminder to review official API docs quarterly
- Test sync with a new contact: Create a test contact in Xano and verify it syncs end-to-end
- Review lead score accuracy: Sample 10 contacts in GHL and verify lead scores match their engagement level
Sync Failure Recovery
If a batch of contacts fails to sync (e.g., due to temporary API outage):
- Identify the failed contact IDs from Xano workflow logs
- Use Postman to manually re-sync each contact (see Phase 6)
- Verify in GHL that contacts now appear
- Update Xano flag to mark contacts as “synced to GHL”
Phase 9: Advanced Customization (Optional)
Custom Lead Scoring Rules
In Xano, create advanced logic to calculate lead scores based on email engagement:
Rule: Email Opened → +5 points
Rule: Email Link Clicked → +10 points
Rule: Email Replied → +25 points
Rule: Visited Landing Page → +15 points
Rule: Form Submitted → +50 points
Rule: Scheduled Call → +100 points
Map these events via Zapier or direct Xano API calls to update the lead score in real-time.
Conditional Sync Based on Lead Score
Only sync high-value leads (score > 50) to GHL:
- In Xano workflow, add conditional:
- If:
lead_score > 50 - Then: Send HTTP request to GHL
- Else: Skip sync (or send to a low-priority list)
- If:
Two-Way Update (GHL to Xano)
If you update a contact’s status in GHL (e.g., from “Lead” to “Deal”), sync that change back to Xano:
- Create GHL automation: “On Contact Status Change”
- Add action: Send to Zapier
- In Zapier, update Xano contact record with new status
CTA: Ready to Streamline Your Lead Flow?
Managing leads across two platforms wastes time and loses data. The GHL-Xano integration connects your entire tech stack, syncing contacts, automating lead scoring, and updating pipelines in real-time.
Not using GoHighLevel yet? Start your GHL journey with a free account or Pro plan and unlock bidirectional data sync with Xano and 100+ other platforms. Sign up for GoHighLevel today →
Frequently Asked Questions
Q: Does GHL have a native Xano integration?
A: No. GHL does not have a built-in Xano connector in its integration marketplace. The HTTP API method (documented in this guide) is the standard approach used by agencies integrating Xano with GHL.
Q: Can I sync in real-time, or is there a delay?
A: Sync is near-real-time: 2–5 seconds for Xano workflows, 5–10 seconds for Zapier. For truly instantaneous sync (<1 second), you’d need to use Xano’s direct API call within its workflow (not through Zapier), but both methods are functionally identical for most use cases.
Q: What if my GHL API key gets compromised?
A: Immediately regenerate a new key in GHL Settings > API Keys and delete the old key. Update the key in Xano and Zapier. Rotate keys every 90 days as a best practice.
Q: Can I sync more than just contacts (e.g., deals, pipelines)?
A: Yes. The same HTTP API method works for any GHL resource that has an API endpoint. Common use cases: sync deal updates, apply pipeline status changes, create tasks. Refer to GHL’s API documentation for available endpoints.
Q: What’s the maximum number of contacts I can sync?
A: There’s no hard limit, but API rate limits apply: GHL allows ~100 API calls per second. For bulk imports of 10,000+ contacts, use GHL’s bulk import tool instead of the API (it’s faster).
Q: How do I test without affecting production data?
A: Use test Xano tables and test GHL contact lists. Set up separate workflows for test and production. Only turn on production workflows after validation.
Q: Can multiple Xano apps sync to the same GHL account?
A: Yes. Each Xano app uses the same GHL API key. Tag contacts with the Xano app name (e.g., “Xano-App1,” “Xano-App2”) to distinguish sources.
Next Steps
- Generate your GHL API key (Phase 1) – 15 minutes
- Set up Xano workflows (Phase 2) – 1 hour
- Test with Postman (Phase 3) – 30 minutes
- Deploy to production and monitor (Phase 8) – ongoing
Your leads are now flowing seamlessly between Xano and GoHighLevel. Questions? Refer to GHL API Docs or Xano Documentation for the latest updates.