GoHighLevel PayPal Integration Setup: Complete Step-by-Step Guide
You’ve built your sales funnel in GoHighLevel. Leads are converting. Now you need to collect payments—and PayPal is your payment processor.
The problem: GHL doesn’t have a native PayPal integration in its marketplace. Payments fail to sync automatically. Manual reconciliation wastes 5+ hours per week. Failed transactions aren’t logged. Refunds don’t update your funnel status.
This guide walks you through setting up a complete PayPal-to-GoHighLevel integration in 2 hours, covering API authentication, webhook configuration, payment sync, and error handling.
By the end, every PayPal transaction—successful, failed, or refunded—will automatically sync to your GHL contacts, update pipeline status, and trigger follow-up automations.
Key Takeaways
- Integration method: PayPal API + webhooks → GoHighLevel API (no third-party middleware required; direct API-to-API)
- Bidirectional sync: Payments created in PayPal sync to GHL pipeline; refunds update contact status and trigger re-engagement workflows
- Setup time: 2 hours (30 min API setup, 1 hour webhook + payment sync configuration, 30 min testing and troubleshooting)
- Required GHL plan: Pro or higher ($199+/month; API access included at all paid tiers)
- Required PayPal account: PayPal Business or Premier; PayPal Standard does not support webhooks
- Sync method: RESTful API via PayPal Webhooks + GHL Webhooks (direct, no middleware)
- Data synced: Transaction ID, amount, payer email, status (completed, pending, failed), timestamp, refund amount and reason
- Error handling: Failed payments logged in GHL automations; retry logic automatic; manual sync available via Postman if webhook fails
- Cost: Zero additional cost (GHL API included in Pro plan; PayPal API free for Business accounts)
- Testing: Use PayPal Sandbox environment for non-production testing; sandbox and live APIs are separate
Phase 0: Prerequisites and Sandbox Setup (30 Minutes)
What You’ll Need
- Active GoHighLevel account (Pro or higher; $199+/month)
- API access included at all paid tiers
- Active PayPal Business or Premier account (not PayPal Standard)
- Verify your business is eligible for webhooks
- GHL API key (generated in GHL settings)
- PayPal API credentials (Client ID + Secret; generated in PayPal Developer Dashboard)
- Postman app (free; download at postman.com/downloads)
- Alternative: cURL command-line tool
- PayPal Sandbox account (free testing environment; created automatically with developer account)
- A test GHL contact list (for safe testing before production)
API Version Compatibility
Last tested with:
- GoHighLevel API: v1 (as of August 2026)
- PayPal API: v2 (recommended; v1 deprecated in 2022)
Verify endpoint paths and field names in the official API docs before proceeding.
Create a PayPal Sandbox Environment
PayPal Sandbox is a free testing environment identical to live, but uses fake money. Always test here first.
- Go to PayPal Developer Dashboard
- Sign in with your PayPal business account (or create one at paypal.com)
- You’ll see Sandbox and Live tabs at the top
- Click Sandbox
- You’ll see pre-created sandbox accounts:
- Buyer account (for simulating payers)
- Merchant account (your business account for receiving payments)
- Note the email addresses of both accounts; you’ll use them to test
Phase 1: Generate PayPal API Credentials (15 Minutes)
Step 1: Access the PayPal Developer Dashboard
- Go to PayPal Developer
- Sign in with your PayPal business account
- Click Dashboard (top-right)
- Ensure you’re viewing the Sandbox environment (tab at top-left)
Step 2: Create a PayPal App
- In the Dashboard, find Apps & Credentials (left sidebar)
- Click Apps & Credentials
- Select Sandbox tab (if not already selected)
- Click + Create App (under “REST API apps”)
- Enter an app name:
GHL PayPal Integration - Select app type: Merchant (you’re receiving payments)
- Click Create App
PayPal will create the app and display your credentials.
Step 3: Copy Your Client ID and Secret
- Under your new app, you’ll see two fields:
- Client ID (starts with
AV-...or similar) - Secret (a long alphanumeric string)
- Client ID (starts with
- Copy both and store them securely:
PayPal Sandbox Client ID: [paste here]
PayPal Sandbox Secret: [paste here]
Integration: GoHighLevel
Created: [today's date]
⚠️ Never share your Secret publicly or commit it to version control.
Step 4: Generate an Access Token (Sandbox)
You’ll use the Client ID and Secret to request an access token, which authenticates API calls.
- Open Postman (or cURL)
- Create a new POST request to:
https://api.sandbox.paypal.com/v1/oauth2/token - Add Authorization header:
- Type: Basic Auth
- Username:
[Your Client ID] - Password:
[Your Secret]
- Add Body (form-data):
- Key:
grant_type - Value:
client_credentials
- Key:
- Click Send
Success response (Status 200):
{
  "scope": "https://api.paypal.com/v1/payments/.*",
  "access_token": "A21ABCDEFGHIJKLMNOPQRSTUVWXYZabcdefghijklmnopqrstuvwxyz1234567890",
  "token_type": "Bearer",
  "app_id": "APP-12AB34CD56EF78GH",
  "expires_in": 3599
}- Copy the
access_tokenvalue (long alphanumeric string) - Store it securely; you’ll use it to make PayPal API calls
Note: Access tokens expire after ~1 hour. For production automations, regenerate tokens automatically using the Client ID and Secret.
Phase 2: Generate GoHighLevel API Credentials (15 Minutes)
Step 1: Log Into Your GHL Account
- Go to GoHighLevel Dashboard
- Sign in with your agency account
- Navigate to Settings (gear icon, left sidebar)
Step 2: Find API Settings
- In Settings, look for API & Integrations > API Keys (or search “API”)
- Click API Keys or Manage API Keys
Step 3: Create a New API Key
- Click + Generate New API Key or Create API Key
- Enter app name:
PayPal Integration - [Your Agency Name] - Enable permissions:
- ✅ Contacts (read and write)
- ✅ Pipelines (read and write)
- ✅ Opportunities/Deals (read and write)
- ✅ Transactions or Payments (if available)
- ✅ Automations (read)
- Click Create API Key
GHL displays your key (example):
eyJhbGciOiJIUzI1NiIsInR5cCI6IkpXVCJ9.eyJpc3MiOiJodHRwczovL2dvaGlnaGxldmVsLmNvbSIsImF1ZCI6IlBheVBhbC1JbnRlZ3JhdGlvbiIsImlhdCI6MTY5NDE0NTAwMH0.a1b2c3d4e5f6g7h8i9j0k1l2m3n4o5p6q7r8s9t0u1v- Copy and store securely:
GHL API Key: [paste here]
GHL Base URL: https://api.gohighlevel.com/v1/
Integration: PayPal
Created: [today's date]
Step 4: Find Your GHL Account ID
- In GHL, go to Settings > Account Info (or Settings > General)
- Copy your Account ID (format: UUID like
1a2b3c4d-5e6f-7g8h-9i0j-1k2l3m4n5o6p) - Store it alongside your API key
Phase 3: Set Up PayPal Webhooks (30 Minutes)
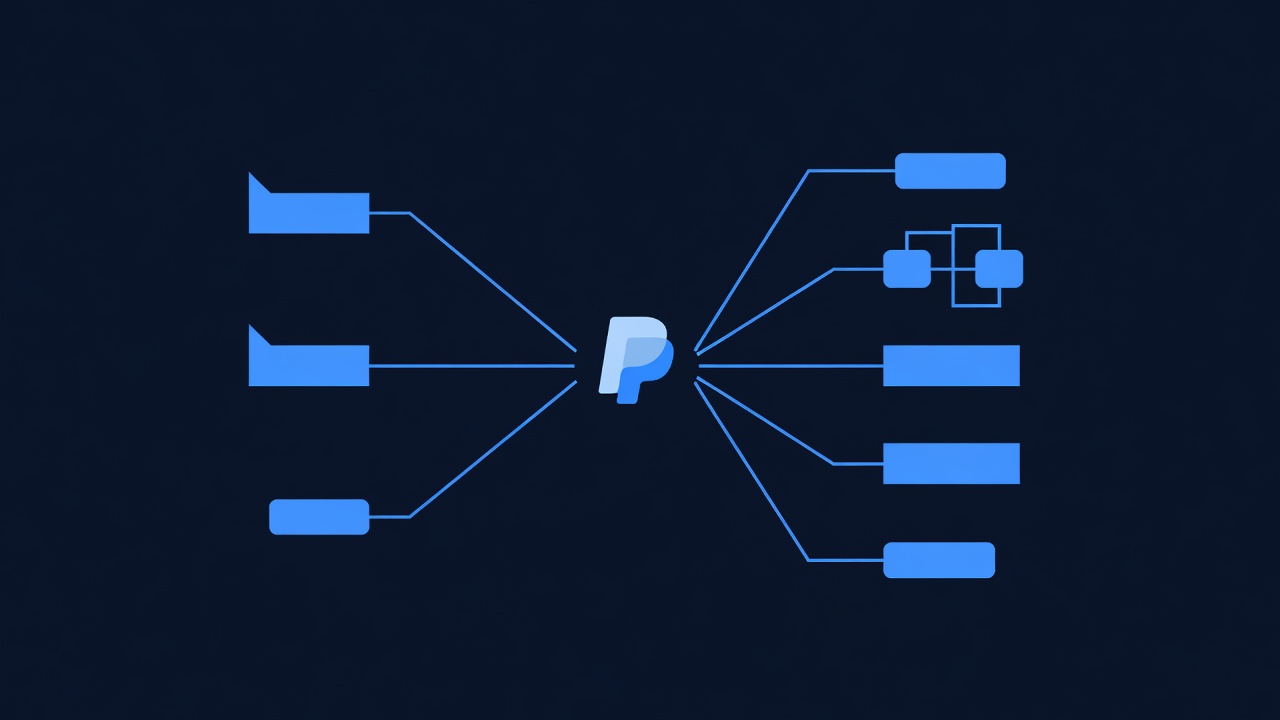
Webhooks notify your system instantly when PayPal events occur (payment completed, refunded, etc.).
Step 1: Create a PayPal Webhook Endpoint
A webhook endpoint is a URL that receives event notifications from PayPal. For this guide, we’ll use Zapier as the intermediary (simpler than hosting your own webhook server).
Option A: Use Zapier (Recommended for non-developers):
- Go to Zapier.com and sign in (create free account if needed)
- Click + Create > Create a Zap
- Trigger app: Select PayPal
- Trigger event: Select Payment Received
- Connect your PayPal sandbox account
- Action app: Select Webhooks by Zapier > POST
- Webhook URL: We’ll get this from GHL in Step 2
- Save the Zap (don’t turn it on yet)
Option B: Self-Hosted Webhook (Advanced): If you have development resources, host a webhook server that:
- Listens for POST requests from PayPal
- Validates PayPal’s signature
- Forwards payment data to GHL API
For this guide, we’ll continue with Option A (Zapier).
Step 2: Create a GHL Webhook Receiver
- In GHL, go to Settings > Webhooks (or Settings > Integrations > Webhooks)
- Click + Create Webhook
- Webhook name:
PayPal Payment Received - Webhook event: Select Custom Webhook or Payment Received (if available)
- GHL will generate a unique webhook URL (example):
https://webhook.gohighlevel.com/webhook/paypal-payment-abc123xyz - Copy this URL
Step 3: Connect PayPal to GHL via Zapier
- Return to your Zapier Zap (from Step 1, Option A)
- In the Webhooks by Zapier > POST action:
- URL: Paste your GHL webhook URL from Step 2
- Method: POST
- Data: Map PayPal fields to GHL fields (see Step 4)
- Click Test to verify the connection
- If successful, continue to Step 4
Step 4: Map PayPal Fields to GHL Format
In the Zapier action, map PayPal transaction fields to GHL’s expected schema:
Zapier field mapping:
| PayPal Field | GHL Field | Example |
|---|---|---|
payer.email_address | contactEmail | john@example.com |
payer.name.given_name | firstName | John |
payer.name.surname | lastName | Doe |
purchase_units[0].amount.value | amount | 99.99 |
status | transactionStatus | COMPLETED |
id | transactionId | 3H124083H123456K |
create_time | timestamp | 2026-08-24T10:30:00Z |
Example Zapier POST body:
{
  "contactEmail": "john@example.com",
  "firstName": "John",
  "lastName": "Doe",
  "amount": 99.99,
  "transactionStatus": "COMPLETED",
  "transactionId": "3H124083H123456K",
  "timestamp": "2026-08-24T10:30:00Z"
}
Step 5: Enable PayPal Webhooks in Developer Dashboard
- Return to PayPal Developer Dashboard
- Go to Sandbox > Apps & Credentials
- Under your app, click Sandbox Signature Certificates or Webhook Events (depending on your PayPal version)
- Click + Add Webhook or Create Webhook
- Enter the webhook URL from your GHL webhook receiver (Step 2)
- Select events to subscribe to:
- ✅ PAYMENT.CAPTURE.COMPLETED (payment successful)
- ✅ PAYMENT.CAPTURE.DENIED (payment failed)
- ✅ PAYMENT.CAPTURE.REFUNDED (refund issued)
- ✅ PAYMENT.CAPTURE.PENDING (payment pending)
- Click Create Webhook
PayPal will send a test notification to your webhook URL. Check GHL webhooks log to verify receipt.
Phase 4: Create GHL Automations for Payment Sync (45 Minutes)
Now that webhooks are configured, create GHL automations to handle incoming payments.
Step 1: Create Automation - Payment Received (Success)
- In GHL, go to Automations > New Automation
- Name it:
PayPal Payment Received - Update Pipeline - Set the trigger:
- Trigger type: Webhook (or Custom Webhook)
- Webhook name:
PayPal Payment Received(the one you created in Phase 3, Step 2) - Click Create
Step 2: Add Actions to Process Payment
-
Add Action 1: Update Contact
- Find contact by: Email
- Email field: Use webhook data
{{contactEmail}} - Update field:
PaymentStatus(custom field) - Set value to:
Paid - Click Add Action
-
Add Action 2: Update Pipeline
- Contact: Use webhook contact from Step 1
- Pipeline: Select your sales pipeline (e.g., “Opportunity” or “Sales Pipeline”)
- Stage: Set to “Closed Won” or “Payment Received”
- Amount: Use webhook data
{{amount}} - Click Add Action
-
Add Action 3: Create Deal/Opportunity (if not already created)
- Contact: Use webhook contact
- Deal name: Use webhook data
{{firstName}} {{lastName}} - {{amount}} - Deal value: Use webhook data
{{amount}} - Status: “Closed Won”
- Click Add Action
-
Add Action 4: Send Thank You Email (optional)
- To: Webhook contact email
- Email template: Select or create “Payment Received Thank You”
- Variables: Insert transaction ID, amount, date
- Click Add Action
-
Add Action 5: Send Internal Notification (optional)
- Send to: Your Slack channel or internal email
- Message: “Payment received from {{firstName}} {{lastName}}: ${{amount}} (ID: {{transactionId}})”
- Click Add Action
Step 3: Create Automation - Payment Failed
- Create a new automation:
PayPal Payment Failed - Alert - Set trigger: Webhook with event type = PAYMENT.CAPTURE.DENIED
- Add actions:
- Action 1: Update contact →
PaymentStatus= “Failed” - Action 2: Send internal alert → Slack/email to your team
- Action 3: Send customer email → “We had trouble processing your payment. Please try again or contact support.”
- Action 4: Add tag →
PaymentFailedorRequiresFollowUp
- Action 1: Update contact →
Step 4: Create Automation - Refund Issued
- Create a new automation:
PayPal Refund Issued - Update - Set trigger: Webhook with event type = PAYMENT.CAPTURE.REFUNDED
- Add actions:
- Action 1: Update contact →
PaymentStatus= “Refunded” - Action 2: Update pipeline stage → Move deal to “Refunded” stage
- Action 3: Create note → “Refund issued: ${{refundAmount}}”
- Action 4: Send customer email → “Your refund has been processed and will appear in 3–5 business days.”
- Action 1: Update contact →
Step 5: Activate All Automations
- For each automation (Successful, Failed, Refund), toggle Active (switch on)
- Verify all automations are active before testing
Phase 5: Test Payment Sync with Sandbox (30 Minutes)
Test Scenario 1: Simulate a Successful Payment
- Go to PayPal Sandbox
- Sign in with your Merchant sandbox account (the business account)
- Create a test payment (or use Postman to trigger a test via PayPal API)
Using PayPal Sandbox UI:
- Log in to sandbox.paypal.com as merchant
- Go to Transactions > Test Transactions (or Tools > Test Transactions)
- Create a new transaction:
- Payer: Select your buyer sandbox account
- Amount: $99.99
- Description: “GHL Test Payment”
- Submit the transaction
Using Postman (Advanced):
- In Postman, create a new POST request
- URL:
https://api.sandbox.paypal.com/v2/checkout/orders - Headers:
Authorization: Bearer [your sandbox access token from Phase 1, Step 4]Content-Type: application/json
- Body (raw JSON):
{
  "intent": "CAPTURE",
  "purchase_units": [
    {
      "amount": {
        "currency_code": "USD",
        "value": "99.99"
      },
      "description": "Test GHL Payment"
    }
  ],
  "payer": {
    "email_address": "test-paypal-2026@example.com",
    "name": {
      "given_name": "Test",
      "surname": "Buyer"
    }
  }
}- Send the request and capture the order ID from the response
- Create a second POST request to capture the payment (complete the payment flow)
Test Scenario 2: Verify Payment Synced to GHL
After triggering a test payment (Scenario 1), wait 5–10 seconds for the webhook to fire.
-
In GHL, go to Contacts
-
Search for “test-paypal-2026@example.com” (or the test buyer email)
-
Verify contact record shows:
- ✅ First name: “Test”
- ✅ Last name: “Buyer” (or “Contact” if buyer name unavailable)
- ✅ Email: “test-paypal-2026@example.com”
-
Go to Pipelines (or Opportunities)
-
Search for the deal/opportunity created from this payment
-
Verify:
- ✅ Deal name includes test contact name and amount
- ✅ Deal stage: “Closed Won” or “Payment Received”
- ✅ Deal value: $99.99
- ✅ Contact linked to deal
-
Go to contact record > Activity tab
-
Verify:
- ✅ Email received thank you email (if configured)
- ✅ Pipeline stage change logged
- ✅ Custom field
PaymentStatus= “Paid”
If all three verification steps pass, ✅ payment sync is working!
Test Scenario 3: Simulate a Failed Payment
- In PayPal Sandbox, attempt a payment with invalid data (e.g., expired test card)
- Or manually trigger a webhook with
status: DENIED - Wait 5–10 seconds for the webhook
- In GHL, verify:
- Contact tag
PaymentFailedapplied - Slack/internal notification sent
- Contact received “Payment failed” email
- Contact tag
Test Scenario 4: Simulate a Refund
- In PayPal Sandbox, refund a previous test payment
- Wait 5–10 seconds for the webhook
- In GHL, verify:
- Contact
PaymentStatusupdated to “Refunded” - Deal stage moved to “Refunded”
- Refund email sent to contact
- Contact
Phase 6: Move to Production (30 Minutes)
Once sandbox testing is complete, activate your live PayPal integration.
Step 1: Generate Live PayPal API Credentials
- In PayPal Developer Dashboard, click the Live tab (top-left)
- Go to Apps & Credentials
- You should see a pre-created REST API app (PayPal creates this automatically)
- Click the app and copy:
- Live Client ID (starts with
AV...) - Live Secret (long alphanumeric string)
- Live Client ID (starts with
- Store these securely (different from sandbox credentials)
Step 2: Generate Live PayPal Access Token
- In Postman, create a new POST request to:
https://api.paypal.com/v1/oauth2/token(note: no “sandbox” in URL) - Add Authorization (Basic Auth):
- Username:
[Your Live Client ID] - Password:
[Your Live Secret]
- Username:
- Add Body:
grant_type: client_credentials
- Send the request
- Copy the
access_tokenfrom the response - Store it securely
Step 3: Update GHL Automations to Use Live Webhook
- In GHL, go to Settings > Webhooks
- Find your
PayPal Payment Receivedwebhook - Update the webhook configuration to point to live PayPal (not sandbox)
- No URL change needed; GHL webhook receiver works for both sandbox and live
Step 4: Update Zapier to Use Live PayPal
- In Zapier, find your PayPal Zap
- Click Edit
- In the PayPal trigger, reconnect your account:
- Disconnect the sandbox account
- Connect your live PayPal business account
- Click Test to verify live PayPal connection
- Turn the Zap On
Step 5: Update GHL API Calls (If Using Direct API)
If you’re calling GHL API directly (not via Zapier webhooks), ensure all Postman requests or API code use:
- Live PayPal endpoint:
https://api.paypal.com/v2/...(not sandbox) - Live GHL API key: Regenerate a new key for production (optional but recommended)
Step 6: Production Checklist
Before going live with real payments, verify:
- Live PayPal API credentials generated and stored securely
- Live access token generated and tested in Postman
- Zapier Zap connected to live PayPal and turned on
- GHL automations activated (all three: successful, failed, refund)
- GHL webhook receiver configured and tested
- Sandbox test contacts deleted from production GHL account
- Email templates reviewed and tested
- Internal Slack notifications configured (optional)
- Backup payment process documented (manual payment entry if automation fails)
- Team trained on sync flow and troubleshooting
Phase 7: Monitoring and Error Handling (15 Minutes)
Common Sync Failures and Fixes
| Error | Cause | Fix #1 | Fix #2 | Fix #3 | Fix #4 | Fix #5 |
|---|---|---|---|---|---|---|
| Webhook not firing | PayPal webhook disabled; incorrect URL | Enable webhook in PayPal dev dashboard. Verify URL matches GHL webhook receiver endpoint. | Check PayPal Event Log in dev dashboard; look for delivery failures. | Resend the failed event manually from PayPal dashboard. | Verify Zapier Zap is On. | Check Zapier task history for errors. |
| Contact not created in GHL | Email field missing or malformed in webhook payload; GHL API permission missing | Verify PayPal webhook includes payer.email_address field. Map it correctly in Zapier. | Test PayPal API response in Postman to confirm email is present. | Check GHL API key has “Contacts” scope enabled. | Add debug logging to Zapier action to see the exact data being sent to GHL. | Manually create contact in GHL to verify Contact creation is possible. |
| Payment amount not syncing | Amount field mapped incorrectly; currency mismatch | In Zapier, verify purchase_units[0].amount.value is mapped to GHL amount field. | Ensure amount is numeric (e.g., 99.99, not “$99.99”). | Check decimal precision (PayPal sends 99.99, GHL expects same format). | Add currency field to deal (e.g., USD) if required. | Test with Postman to verify PayPal API returns amount correctly. |
| Deal not created; contact created instead | GHL automation missing “Create Deal” action; automation not triggered | Verify the PayPal Payment Received automation has “Create Deal” action. Activate automation. | Check automation trigger is set to correct webhook (PayPal Payment Received). | Review automation execution log (Automations > [Your automation] > Logs) to see if it ran. | If automation didn’t run, check webhook delivery (PayPal dev dashboard > Event Log). | Manually create deal in GHL to verify deal creation is possible. |
| Duplicate payments in GHL | Webhook fired multiple times; sync triggered twice | Add conditional in automation: “Only create deal if transaction ID doesn’t already exist.” | Use GHL’s de-duplication feature (if available) to prevent duplicate transaction IDs. | Implement idempotency key in Zapier (store transaction ID and skip re-processing). | Check PayPal Event Log to see if the same event was delivered twice. | Delete duplicate deals in GHL manually; adjust automation logic before next payment. |
Daily Monitoring (First 2 Weeks)
-
Check GHL Automations Log:
- Go to Automations > [Your automation] > Logs
- Look for red error entries
- If errors appear, resolve immediately
-
Check Zapier Task History:
- In Zapier, open your PayPal Zap
- View Task History
- Count successful vs. failed tasks
- If >5% failures, investigate
-
Spot-Check Deals in GHL:
- Randomly open 3–5 deals created from PayPal payments
- Verify amount, contact, status, and timestamp are correct
Weekly Monitoring (After First 2 Weeks)
- Run the same checks above once per week
- Compare week-over-week payment volume (expected vs. actual)
- If sync count drops >20%, investigate webhook status
- Review error log and implement fixes
Monthly Maintenance
- Rotate API credentials: Regenerate PayPal and GHL API keys every 90 days
- Review PayPal event log: Check for failed webhook deliveries
- Test sandbox: Create a test payment in sandbox monthly to verify integration still works
- Audit pipeline: Verify all payments are appearing as deals in the correct pipeline stage
Manual Sync Fallback
If automated webhooks fail for a payment, manually sync:
-
In PayPal Sandbox/Live, note the transaction details:
- Transaction ID
- Payer email
- Amount
- Status
- Timestamp
-
In GHL, manually create a contact and deal with the payment data
-
Mark deal as “Closed Won”
-
Tag contact with
ManualSync-PayPalfor later audit -
Investigate why webhook failed and fix the underlying issue
Phase 8: Advanced Customization (Optional)
Conditional Routing Based on Payment Status
Create automations that route different customers based on payment outcome:
IF payment status = COMPLETED
  → Move to "Sales Follow-Up" pipeline
  → Send upsell email

IF payment status = PENDING
  → Move to "Awaiting Payment" stage
  → Set reminder to follow up in 24 hours

IF payment status = DENIED
  → Move to "Payment Failed" stage
  → Send retry payment email with link
Partial Refund Handling
When a refund is issued, sync only the refunded amount (not full payment reversal):
- In Zapier, add field:
refundAmount(map from PayPal webhook) - In GHL automation, create a note: “Partial refund: ${{refundAmount}}”
- Adjust deal value:
Deal Amount - Refund Amount - Move deal to “Partially Refunded” stage
Recurring Payment Tracking
For subscriptions or recurring charges:
- Enable PayPal Recurring Payments API
- In Zapier, map recurring payment events
- In GHL, create a contact subscription status field (Active/Paused/Cancelled)
- Trigger automations on subscription events (renewal, cancellation, failure)
Payment Reconciliation Report
Generate a weekly report of all payments synced:
- In GHL, create a view of all deals created in the past 7 days with tag
PayPal-Source - Export as CSV
- Compare with PayPal transaction