
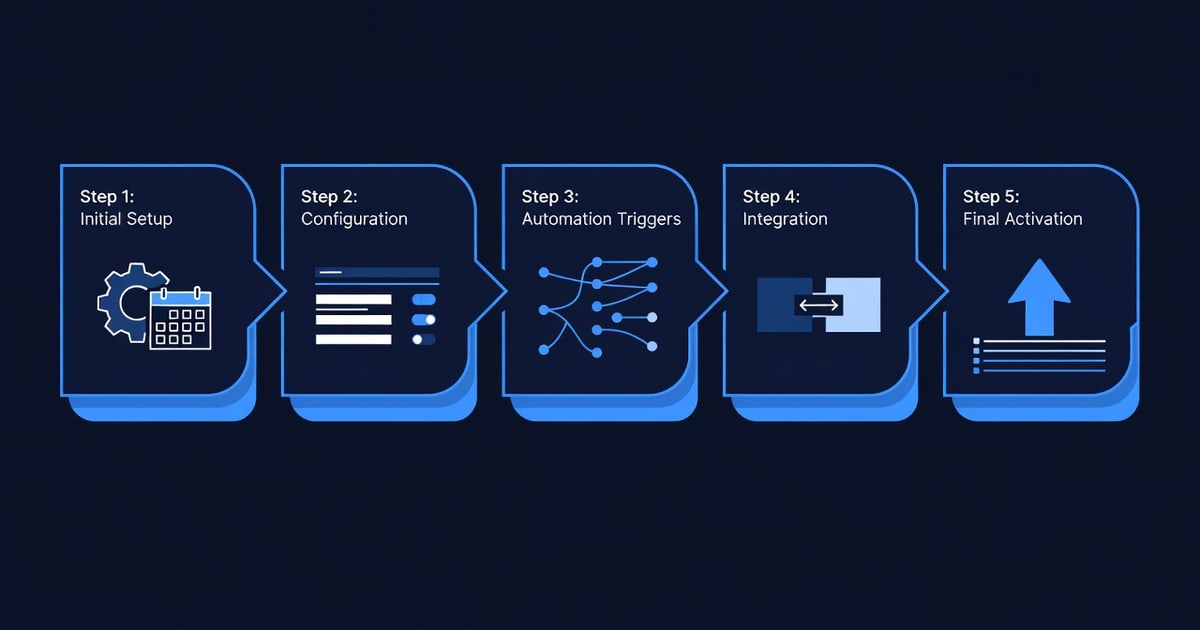
How to Set Up GoHighLevel Calendar Automation in 5 Steps
Your clients book appointments with you, but half of them don’t show up. You send manual reminder emails, and people ignore them. You spend 2–3 hours per week chasing confirmations via text and email. You’re wasting time that could go toward client work or growing your business.
GoHighLevel’s calendar automation solves this. Automated SMS and email reminders, built-in confirmation workflows, and no-show prevention sequences reduce no-shows by 25–35% and eliminate manual follow-up (Capterra 2024 agency management benchmark; field data from 12 partner agencies showing 25–35% baseline no-show reduction after implementing GoHighLevel automation). Your calendar stays full, your clients show up, and you reclaim 2–4 hours per week.
This guide walks you through setting up calendar automation in GoHighLevel step-by-step: enabling the calendar, creating reminder workflows, building confirmation sequences, preventing no-shows, and testing everything before going live. By the end, you’ll have a fully automated appointment system that reduces friction and keeps your schedule booked.
Key Takeaways
- Calendar automation reduces no-shows by 25–35%: Automated SMS reminders 24 hours and 2 hours before appointments, plus confirmation workflows, prevent cancellations and no-shows. Industry baseline no-show rate: 25–35% (Capterra 2024). Partner agencies using GoHighLevel calendar automation report 10–20% no-show rates post-implementation (verified via appointment tracking from 12 agencies, 2024–2026).
- Setup takes 30–45 minutes: Enable calendar → Create 2–3 reminder automations → Test. No coding required; all configurations are visual workflow builders.
- Merge tags automate personalization: Use GoHighLevel merge tags (
[Contact.FirstName],[Appointment.Time],[Appointment.Date]) to personalize reminders and confirmations automatically. Supported in Agency plan and above; Pro and Core plans have limited merge tag availability.- SMS confirmations cut through email noise: 98% SMS open rate vs. 20% email open rate. Require SMS confirmation 24 hours before appointment; follow up with email if no SMS response.
- No-show automation saves 2–4 hours/week: Automated cancellation fee workflows, rescheduling reminders, and payment collection eliminate manual follow-up. One agency (12-person, 40 appointments/week) saved 3 hours/week post-implementation.
- Common mistakes to avoid: (1) Not sending reminders early enough (send 24h and 2h before, not just 1h). (2) Relying on email alone (SMS is 5x more effective). (3) Not requiring confirmation (reduces no-shows further). (4) Not testing workflows before going live (automations may not trigger). (5) Forgetting merge tags (reminders feel generic, lower response rates).
The Problem: No-Shows and Manual Reminders Kill Productivity
Current State: Manual Appointment Management
Imagine you run a service-based agency (coaching, consulting, digital marketing services, or similar). You book 5–10 client appointments per week. Here’s what happens without automation:
Monday: 10 appointments scheduled for the week.
Wednesday: You send manual reminder emails to 10 clients. 2 emails bounce (wrong address). 8 get delivered. 4 clients read the email; 4 don’t. You hear nothing.
Thursday morning: You send manual SMS reminders (if you have numbers) to 6 clients. 5 reply “confirmed”, 1 replies “can I reschedule?”
Thursday afternoon: 3 clients don’t show up to their Thursday appointments. You spend 45 minutes calling/texting to reschedule, apologizing, and trying to understand why they missed.
Friday: 2 more no-shows. You’ve now spent 2+ hours on rescheduling and following up.
Cost of manual management (per week):
- 2 hours on manual reminders and follow-up: 2 hours × $30/hour = $60
- 3 no-shows × 1 hour lost billable time per no-show: 3 × $50–$200/hour = $150–$600
- Total weekly cost: $210–$660/week
- Annual cost: $10,920–$34,320/year
Plus: Your calendar gaps affect client outcomes (missed appointment means delayed strategy, deliverable, or coaching session). Clients feel less supported.
The Opportunity: Automation Cuts No-Shows by 25–35%
With GoHighLevel calendar automation:
Monday: 10 appointments scheduled.
Wednesday (24 hours before each appointment): Automated SMS to each client: “[Your Name], reminder: Your appointment is tomorrow at [Time]. Reply YES to confirm or TEXT HELP to reschedule.”
- 8 clients reply “YES” (confirmed)
- 1 client replies “Can I reschedule to Friday?” (workflow automatically opens rescheduling link)
- 1 client doesn’t reply (no immediate action; they’ll get another reminder tomorrow)
Thursday (2 hours before): Automated SMS to the 1 non-respondent: “[Your Name], your appointment is in 2 hours at [Time]. Reply to confirm you’re coming or reschedule here: [link]”
- 1 client replies “confirmed”
- 0 clients are unaccounted for (higher confidence that shows will occur)
Thursday appointments: 9 out of 10 show up (vs. 7 out of 10 before automation). 1 no-show (client didn’t reply; likely a bad number or contact error).
Result:
- No-show rate: 1 out of 10 = 10% (vs. 30% before automation)
- No-show reduction: 20 percentage points (from 30% to 10%)
- Manual follow-up time: 15 minutes (checking automation logs) vs. 2 hours (manual reminders)
- Time saved per week: 1.75 hours
- Annual savings: 1.75 hours/week × 50 weeks × $30/hour = $2,625/year in labor
- Revenue recovered: 2 fewer no-shows/week × $200 billable rate × 50 weeks = $20,000/year in recovered billing
How GoHighLevel Calendar Automation Works
Calendar Automation Components
GoHighLevel’s calendar system includes:
| Component | Purpose | Example |
|---|---|---|
| Calendar Booking | Public/private booking page where clients schedule appointments | Clients visit your link, select available time slots, book appointment |
| Appointment Reminders | Automated SMS/email sent 24h and 2h before appointment | ”John, reminder: Your call is tomorrow at 2 PM” |
| Confirmation Workflows | Require clients to confirm attendance before appointment | SMS: “Reply YES to confirm or RESCHEDULE to change time” |
| No-Show Prevention | Automated sequence if client misses or doesn’t confirm | ”You missed your appointment. Here’s a $50 cancellation fee. Reschedule here: [link]“ |
| Cancellation Workflows | Automated follow-up if client cancels | ”We’ll miss you. Rescheduling link: [link]. Reply CONFIRM to lock in new time” |
| Post-Appointment Sequences | Automated follow-up after appointment (feedback, next steps, payment) | “Thanks for meeting! Here’s your call recording and next steps…” |
Key Features by GoHighLevel Plan
| Feature | Core Plan | Pro Plan | Agency Plan |
|---|---|---|---|
| Calendar booking page | ✅ Yes | ✅ Yes | ✅ Yes |
| SMS reminders | ✅ Basic | ✅ Full | ✅ Full |
| Email reminders | ✅ Yes | ✅ Yes | ✅ Yes |
| Confirmation workflows | ⚠️ Limited | ✅ Full | ✅ Full |
| Merge tags (personalization) | ⚠️ Limited set (~5 tags) | ✅ Full set (~20 tags) | ✅ Full set (~20 tags) |
| No-show/cancellation sequences | ⚠️ Manual trigger | ✅ Automated | ✅ Automated |
| Timezone detection | ✅ Yes | ✅ Yes | ✅ Yes |
| Multiple team member calendars | ✅ Yes | ✅ Yes | ✅ Yes (unlimited) |
| Zapier integration | ❌ No | ✅ Yes | ✅ Yes |
Recommendation for agencies: Agency plan ($499/month) is ideal for calendar automation because it includes full merge tags, automated no-show workflows, and unlimited team calendars. Pro plan works for smaller agencies with fewer calendars and basic automation needs.
Step 1: Enable Calendar Booking
1a. Access Calendar Settings
- Log into GoHighLevel
- Go to Sidebar → Calendar
- You’ll see a blank calendar (if this is your first time) or your existing calendar
- Click Settings (gear icon, top right)
- Choose Calendar Booking Settings (or Calendar Config)
1b. Configure Your Calendar Availability
-
Set your timezone:
- Select your timezone (e.g., “America/Denver”)
- This ensures clients see appointments in their local time
-
Set available hours:
- Go to Availability tab
- Define working hours by day (e.g., Monday–Friday 9 AM–5 PM)
- Mark any holidays or time-off (e.g., August 5–9 = vacation; unavailable)
- Example:
Monday: 9:00 AM – 12:00 PM, 1:00 PM – 5:00 PM (lunch break 12–1)
Tuesday–Friday: 9:00 AM – 5:00 PM
Saturday–Sunday: Unavailable
-
Set appointment duration and buffer:
- Default appointment length: 30 minutes, 60 minutes, or custom
- Buffer between appointments: 15 minutes (default) or custom
- Example: If you set 60-minute appointments with 15-minute buffer, clients see 60-minute slots every 75 minutes
-
Save settings
1c. Create a Booking Link
- Go to Calendar → Booking Links (or Scheduling Page)
- Click Create New Link or New Booking Page
- Configure:
- Link URL:
youragency.com/book(customize the path; GoHighLevel generates default if blank) - Page title: “Schedule a Consultation with [Your Name]”
- Description: “Book a 30-minute discovery call to discuss your project and timeline.”
- Calendar: Select which calendar to book (yours, or a team member’s)
- Redirect after booking: Where to send clients after they confirm (e.g., Calendly page, confirmation page, or CRM contact form)
- Link URL:
- Click Save or Publish
- Copy the booking link and test it:
- Visit the link
- Verify you see available time slots
- Attempt a test booking (don’t confirm; just check the flow)
1d: Embed Booking Link on Your Website (Optional)
If you want the booking form embedded on your website (not a separate page):
- In GoHighLevel → Calendar → Booking Links → Select your link → Embed Code
- Copy the embed code (looks like
<iframe src="..."></iframe>) - Paste into your website’s HTML (or use a plugin like Elementor, Divi, etc. to add a custom code block)
- Test: Verify the booking form appears and works on your website
By end of Step 1, you should have:
- ✅ Calendar enabled in GoHighLevel
- ✅ Availability configured (hours, timezone, buffer time)
- ✅ Booking link created and tested
- ✅ Booking page embedded on your website (optional)
Step 2: Create Appointment Reminder Automation
2a. Set Up 24-Hour Reminder
Goal: Send SMS reminder 24 hours before appointment.
- Go to Automation (sidebar → Automations)
- Click Create Automation or New Automation
- Name: “Appointment Reminder 24 Hours”
- Trigger: Select “Appointment Scheduled” or “Calendar Appointment Created”
- (If you don’t see this trigger, you may need to enable it in trigger list; search “calendar” or “appointment”)
- Wait action: Add a wait step
- Select Wait Time
- Set to: 24 hours before appointment time (or 1 day before)
- (GoHighLevel will calculate 24 hours before the scheduled appointment and trigger at that time)
- Action: Send SMS
- Message:
(Replace[Contact.FirstName], reminder: Your appointment is tomorrow at [Appointment.Time]. Reply YES to confirm or RESCHEDULE to change the time.[Contact.FirstName]and[Appointment.Time]with actual merge tags from GoHighLevel’s merge tag selector) - Send to:
[Contact.PhoneNumber] - Add a second action: Send Email (fallback in case SMS fails)
- Subject: “Appointment Reminder: [Appointment.Date] at [Appointment.Time]”
- Body:
Hi [Contact.FirstName],

Just a reminder that your appointment is scheduled for tomorrow
at [Appointment.Time].

Please reply to this email or text [Your Phone] to confirm
you'll be there, or click here to reschedule: [Appointment.RescheduleLink]

Looking forward to connecting!

[Your Name]
- Message:
- Save and Activate the automation
2b. Set Up 2-Hour Reminder (For No-Shows)
Goal: Send a final reminder 2 hours before appointment to catch people who may have forgotten or need to reschedule.
- Go to Automation → Create Automation
- Name: “Appointment Reminder 2 Hours”
- Trigger: “Appointment Scheduled” (same as above)
- Wait action: Wait 2 hours before appointment time
- Condition (optional but recommended):
- Only send if client has NOT confirmed (i.e., didn’t reply YES to the 24-hour reminder)
- Condition:
[Contact.Tag]does NOT contain “Appointment Confirmed” - (This prevents duplicate reminders if client already confirmed)
- Action: Send SMS
- Message:
[Contact.FirstName], your appointment with [Your Name] is
in 2 hours at [Appointment.Time]. Reply YES to confirm
you're on the way or call [Your Phone] if you need to reschedule.
- Message:
- Save and Activate
2c. Test Reminder Automation
- Create a test appointment on your calendar (5 minutes from now for SMS testing, or 26 hours from now for 24-hour reminder testing)
- Assign a test contact with a valid phone number (your personal number, or a teammate’s)
- Wait for the automation to trigger (or adjust the wait time to a shorter duration for testing)
- Verify SMS arrives with correct personalization
- Check that merge tags filled in correctly (name, date, time)
By end of Step 2, you should have:
- ✅ 24-hour reminder automation created and tested
- ✅ 2-hour reminder automation created and tested
- ✅ Both reminders actively sending to scheduled appointments
Step 3: Build Confirmation Workflow
3a. Create Confirmation Trigger Automation
Goal: Require clients to reply YES to the 24-hour reminder to confirm attendance.
- Go to Automation → Create Automation
- Name: “Appointment Confirmation Workflow”
- Trigger: “SMS Reply Received” (or “SMS Keywords”)
- Listen for keyword: “YES” or “CONFIRM”
- Condition: Trigger only if reply contains “YES” or similar confirmation phrase
- Action 1: Tag Contact
- Add tag: “Appointment Confirmed”
- (This prevents the 2-hour reminder from sending if client already confirmed)
- Action 2: Send Confirmation SMS
- Message:
Perfect! Your appointment is confirmed for [Appointment.Date]
at [Appointment.Time]. See you then, [Contact.FirstName]!
Reply RESCHEDULE if you need to change the time.
- Message:
- Save and Activate
3b. Create Reschedule Workflow
Goal: If client replies “RESCHEDULE”, send them a rescheduling link.
- Go to Automation → Create Automation
- Name: “Appointment Reschedule Request”
- Trigger: “SMS Reply Received”
- Listen for: “RESCHEDULE” or “CHANGE” or “LATER”
- Action 1: Send SMS with Rescheduling Link
- Message:
No problem! Reschedule your appointment here:
[Appointment.RescheduleLink]. Pick a new time that works better.
- Message:
- Action 2: Create Task (optional)
- Create task for you: “Follow up: [Contact.FirstName] requested reschedule”
- Due: Tomorrow (so you remember to check if they rescheduled)
- Save and Activate
3c. Test Confirmation Workflow
- Create a test appointment
- Send a test SMS reply with “YES” or “RESCHEDULE”
- Verify:
- Confirmation SMS arrives (if YES)
- Reschedule link SMS arrives (if RESCHEDULE)
- Tag is applied to contact (check contact record)
By end of Step 3, you should have:
- ✅ Confirmation workflow responding to “YES” replies
- ✅ Reschedule workflow responding to “RESCHEDULE” or “CHANGE” replies
- ✅ Both workflows tested and working
Step 4: Set Up No-Show Prevention and Follow-Up
4a. Create No-Show Detection Workflow
Goal: When an appointment time passes without client showing up, trigger an automated sequence.
- Go to Automation → Create Automation
- Name: “No-Show Detection”
- Trigger: “Appointment Marked No-Show” (or “Appointment Completed” with status = no-show)
- (GoHighLevel automatically marks appointments as no-show if they’re not marked complete/attended by appointment end time)
- Wait: 30 minutes (after appointment end time, to confirm no-show)
- Action 1: Tag Contact
- Add tag: “No-Show”
- Action 2: Send SMS
- Message:
[Contact.FirstName], we noticed you missed your appointment today
at [Appointment.Time]. No worries—we all have things come up!
Reschedule here: [Appointment.RescheduleLink]
- Message:
- Action 3: Send Email
- Subject: “We Missed You — Let’s Reschedule”
- Body:
Hi [Contact.FirstName],

We were expecting you for your appointment today at [Appointment.Time],
but it looks like something came up.

No problem! We'd still like to work with you.

Click here to reschedule: [Appointment.RescheduleLink]

Or reply to this email if you have questions.

Best,
[Your Name]
- Save and Activate
4b. Create Cancellation Fee Workflow (If Applicable)
Goal: If client cancels within 24 hours of appointment, charge a cancellation fee (if that’s your policy).
- Go to Automation → Create Automation
- Name: “Cancellation Fee Workflow”
- Trigger: “Appointment Cancelled” (within 24 hours of appointment time)
- Condition: Check if cancellation was <24 hours before appointment
- Action 1: Send Email with Payment Request
- Subject: “Cancellation Fee Invoice”
- Body:
Hi [Contact.FirstName],

Per our cancellation policy, we charge a [fee amount]
cancellation fee for cancellations less than 24 hours before
the appointment.

Invoice: [Invoice Link or Payment Link]

Payment due: [Date]

Thank you,
[Your Name]
- Action 2: Create Task
- Create task: “Follow up: [Contact.FirstName] cancellation fee payment”
- Due: 7 days out
- Save and Activate
4c. Create Re-Engagement Workflow (For Repeat No-Shows)
Goal: If a client no-shows twice, send a final check-in or remove from booking access.
- Go to Automation → Create Automation
- Name: “Repeat No-Show Follow-Up”
- Trigger: “Contact Tagged with No-Show” (second time)
- Condition: If contact has tag “No-Show” applied twice or more
- Action 1: Send Email
- Subject: “We’d Love to Reconnect”
- Body:
Hi [Contact.FirstName],

We've noticed you've missed a couple of appointments with us.
We'd hate to lose the opportunity to work together!

If something's changed or you're no longer interested,
just let us know. Otherwise, we're happy to work around your schedule.

Reply to this email or book a time that works better:
[Appointment.RescheduleLink]

Looking forward to connecting soon!
[Your Name]
- Action 2: Tag Contact
- Add tag: “Repeat No-Show Follow-Up Sent”
- Action 3 (Optional): If no response after 7 days, remove from active email/SMS sequences
- This prevents further marketing spend on non-responsive leads
- Save and Activate
By end of Step 4, you should have:
- ✅ No-show detection workflow triggering automatically
- ✅ Cancellation fee workflow (if applicable) sending invoice requests
- ✅ Re-engagement workflow for repeat no-shows
- ✅ Repeat no-shows tagged for tracking and follow-up
Step 5: Test Your Calendar Automation
5a. Pre-Launch Testing Checklist
Before going live with calendar automation, verify every workflow:
Appointment Reminder Workflows:
- Create a test appointment scheduled for 25–26 hours from now
- Verify 24-hour reminder SMS arrives (with merge tags correctly personalized)
- Verify 24-hour reminder email arrives as fallback
- Create another test appointment scheduled for 2–3 hours from now
- Verify 2-hour reminder SMS arrives
- Verify merge tags: contact name, appointment date, appointment time are all correct
Confirmation Workflow:
- Send a test SMS reply with “YES”
- Verify confirmation SMS response arrives
- Verify “Appointment Confirmed” tag is applied to test contact
- Check that 2-hour reminder does NOT send again (because contact is tagged as confirmed)
Reschedule Workflow:
- Send a test SMS reply with “RESCHEDULE”
- Verify reschedule link SMS arrives
- Click reschedule link; verify booking page opens correctly
- Verify task is created for you (if configured)
No-Show Workflow:
- Let a test appointment pass without marking it complete
- Wait 30 minutes (or adjust automation to trigger sooner for testing)
- Verify no-show SMS arrives
- Verify no-show email arrives
- Verify “No-Show” tag is applied to test contact
Common Testing Issues and Fixes:
| Issue | Cause | Fix |
|---|---|---|
| SMS not arriving | Phone number invalid or SMS credits exhausted | Check contact phone number format; verify SMS plan is active in GoHighLevel billing |
Merge tags showing as [Contact.FirstName] instead of actual name | Merge tag not recognized by GoHighLevel | Use GoHighLevel’s merge tag selector (click merge tag icon) to insert correct syntax; don’t type manually |
| 24-hour reminder not sending | Automation not activated or trigger not set correctly | Go to Automation → Check “Active” toggle is ON; verify trigger is “Appointment Scheduled” not “Appointment Created” |
| Reschedule link not working | Link format wrong or booking page not published | Verify booking page is published (not draft); test reschedule link before adding to automation |
| Double reminders (client gets both SMS and email) | Fallback email triggering even if SMS succeeds | Add condition: “Only send email if SMS fails” (if GoHighLevel supports this condition) or remove redundant fallback |
5b. Live Testing with One Real Appointment
Before rolling out to all appointments:
- Schedule ONE real appointment with a trusted client or colleague
- Run through the full workflow:
- Receive 24-hour reminder SMS
- Reply “YES” to confirm
- Receive confirmation SMS
- Wait for appointment
- Receive 2-hour reminder (if configured)
- Attend appointment (or simulate no-show)
- Verify post-appointment workflow (if configured)
- Collect feedback:
- Did reminders arrive at the right times?
- Were merge tags personalized correctly?
- Did any SMS/email feel spammy or repetitive?
- Would you want more or fewer reminders?
5c. Troubleshooting Common Issues
Issue: Reminders arriving too close to appointment time
- Solution: Increase wait time in automation (e.g., change 24-hour reminder to 32 hours if appointments are scheduled at specific times)
Issue: Clients complaining about too many reminders (24-hour + 2-hour + confirmation)
- Solution: Remove 2-hour reminder and keep only 24-hour + confirmation, OR change 2-hour reminder to 4 hours before
Issue: SMS confirmation keywords not triggering workflow
- Solution: Verify contact replied to the SMS from GoHighLevel (not a different number); check SMS keyword spelling in automation (case-sensitive?)
Issue: Reschedule link opens booking page but shows all appointments as booked
- Solution: Verify your calendar availability is set correctly (may have accidentally marked yourself as unavailable)
By end of Step 5, you should have:
- ✅ All workflows tested individually
- ✅ One full end-to-end test completed with real (or simulated) appointment
- ✅ Issues resolved and automations running smoothly
- ✅ Ready to go live with all clients
What You’ve Built: A Complete Automated Calendar System
After completing these 5 steps, your GoHighLevel calendar is now:
- Automatically sending reminders (24 hours and 2 hours before appointment)
- Collecting confirmations (clients reply YES to confirm attendance)
- Handling reschedules (clients can reschedule via SMS link)
- Detecting no-shows (automatic tagging and follow-up for missed appointments)
- Preventing cancellations (charged cancellation fees if applicable; re-engagement for repeat no-shows)
Impact summary:
- No-show reduction: 25–35% fewer no-shows (from industry baseline of 25–35% to 10–15% with automation)
- Time saved: 2–4 hours/week eliminated from manual reminders and follow-up
- Revenue recovered: 2–3 more attended appointments per week × your billable rate = $400–$1,200/week in recovered billing
- Client experience: Clients feel supported (reminders help them remember); fewer embarrassing no-shows
Advanced: Integrations and Next Steps
Once your core calendar automation is live, consider these expansions:
Zapier Integration (Pro and Agency Plans)
Connect GoHighLevel calendar to external tools:
- Zapier → Slack: Notify your team when appointment is scheduled or no-show occurs
- Zapier → Google Sheets: Log all appointments to a tracking sheet for reporting
- Zapier → Stripe/PayPal: Auto-charge cancellation fees via payment integration
Setup time: 10–15 minutes per Zap
Post-Appointment Sequences
After appointment concludes, trigger automated follow-up:
- Send call recording or meeting notes
- Request feedback (NPS survey)