

GoHighLevel Pabbly Connect Integration: Setup Guide for Agencies
You’re running a GoHighLevel white-label agency. Your clients use GHL to manage leads, automations, and follow-up, but they also use Slack, Airtable, Google Sheets, Stripe, and a dozen other tools. They want all these platforms to talk to each other without manual data entry.
You’ve heard about Zapier, but the costs add up fast: 750 tasks/month on Zapier’s Pro plan ($20/month) barely covers 20–30 clients. Each client needs 5–10 workflows, and you’re quickly paying $200–$500/month in automation fees across your client base.
Enter Pabbly Connect: a Zapier alternative that costs $1–$3 per workflow per month (not per task). One workflow connecting GHL to Slack costs $1–$3/month instead of Zapier’s $20+ per client.
But setup differs from Zapier. GHL’s webhook support, Pabbly’s connection syntax, and phone number formatting all work differently. Miss one step and:
- Workflows fail silently (GHL data never syncs to Slack)
- Contacts create duplicates (phone number normalization breaks)
- Costs spiral (no workflow limits; easy to create 100+ redundant workflows)
- Compliance tracking breaks (no audit trail or message logging)
This guide walks you through complete Pabbly Connect setup: account creation, GHL-to-Pabbly connection, four essential workflows, cost comparison with Zapier, and real agency examples. By the end, you’ll save 60–80% on automation costs while serving more clients profitably.
Key Takeaways
- Pabbly Connect vs. Zapier: Know the pricing difference. Zapier charges per task (750 tasks/month on Pro = $20/month per account). Pabbly charges per workflow ($1–$3/month per workflow, unlimited tasks). At 30 clients with 5 workflows each, Zapier costs $3,000–$6,000/month; Pabbly costs $150–$450/month. Savings: 85–93%.
- Cost baseline: Pabbly Connect starts at $19/month for up to 20 workflows. Add $1–$3 per workflow above 20. At 50 workflows across your client base, budget $70–$100/month total. GHL built-in automations are free but limited (no SMS-to-Slack, no Stripe sync). Combine GHL automations + Pabbly for best coverage.
- Supported integrations: Pabbly Connect supports 500+ apps including Slack, Airtable, Google Sheets, Stripe, PayPal, Twilio, Mailchimp, Shopify, Zapier (yes, you can nest Zapier in Pabbly if needed), Make, Discord, and 100+ others. GHL API is supported natively. Full list: pabbly.com/connect/integrations.
- Four essential workflows for agencies: (1) New GHL lead → Slack notification, (2) GHL contact updated → Google Sheets row, (3) Stripe payment → GHL contact tag, (4) Twilio inbound SMS → GHL contact + Slack. These four automate 80% of typical multi-client needs.
- Setup time: Account creation (5 min), GHL API key generation (5 min), Pabbly-GHL connection (10 min), first workflow build (15 min). Per workflow after first: ~5 min. Total for 5 workflows: ~1 hour. vs. Zapier: 2–3 hours for same 5 workflows.
- Phone number normalization is critical: Pabbly uses different field mapping than Zapier. GHL phone fields must be explicitly mapped as “Phone” type in Pabbly (not “Text”). Missing this causes duplicate contact creation. See Part 4 for normalization rules.
- No limits on workflow tasks: Unlike Zapier’s monthly task cap, Pabbly has no limit on how many times a workflow runs per month. One workflow can process 10,000 leads and cost the same $1–$3/month. Downside: easy to accidentally create runaway workflows that spam Slack or create contacts infinitely.
- Compliance and audit trail: Pabbly logs all workflow executions in the dashboard (visible for 90 days). GHL contact history auto-updates with workflow tags and data. For 7-year compliance audits (TCPA, GDPR, CCPA), export contact records and workflow logs quarterly; store in cloud archive. Pabbly doesn’t provide 7-year retention by default.
- Webhook reliability: Pabbly retries failed workflow executions up to 5 times (24-hour window). If GHL API is down, Pabbly queues requests. If Pabbly is down, GHL doesn’t know. Best practice: add a manual fallback (e.g., email alert to you if Slack notification fails) or use redundant workflows for mission-critical integrations (e.g., payment processing).
- Common setup mistakes: (1) Forgetting to activate workflow after creation (workflow exists but never runs), (2) Phone field mismatch (mapping phone as “Text” instead of “Phone”; duplicates result), (3) No filter on workflow trigger (workflow runs 1000x/day instead of 10x); (4) Missing API rate-limit documentation (GHL allows 120 API calls/minute; Pabbly + Zapier combined can exceed this). See Part 7 for solutions.
- When to use Pabbly vs. GHL native vs. Zapier: Use GHL native automations for simple tag-based triggers and native actions (email, SMS, pipeline move). Use Pabbly for multi-app workflows (GHL → Slack → Airtable) and cost-sensitive scaling (30+ clients). Use Zapier only if you need advanced conditional logic (Zapier Path) or Pabbly doesn’t support an app. Hybrid approach recommended: GHL native + Pabbly for most agencies.
- Scalability: At 10 clients with 5 workflows each = $50–$100/month Pabbly cost + $0 GHL overhead = $50–$100/month total. At 50 clients with 5 workflows each = $250–$400/month Pabbly cost. At 100 clients = $400–$700/month Pabbly cost. Compare: same scale on Zapier = $3,000–$6,000/month. Pabbly scales profitably; Zapier does not for resellers.
Part 1: Pabbly Connect vs. Zapier vs. GHL Native — Which Should You Use?
Feature & Pricing Comparison
| Feature | GHL Native | Pabbly Connect | Zapier | Make (Integromat) |
|---|---|---|---|---|
| Pricing Model | Free | Per workflow ($1–$3/mo) | Per task ($20–$299/mo) | Per operation ($10–$300+/mo) |
| Cost for 30 clients, 5 workflows each | $0 | $150–$450/mo | $3,000–$6,000/mo | $600–$1,500/mo |
| Integrations | GHL native only (email, SMS, webhooks) | 500+ apps | 6,000+ apps | 1,000+ apps |
| Setup time (1st workflow) | 10 min | 15 min | 20 min | 25 min |
| Setup time (per additional workflow) | 5 min | 5 min | 10 min | 15 min |
| Conditional logic | Basic (tags, delays) | Moderate (if/then, filters) | Advanced (Zapier Paths, complex conditionals) | Advanced (scenario building) |
| Webhook support | Full (inbound + outbound) | Full (inbound + outbound) | Full | Full |
| Rate limits | 120 API calls/min (GHL standard) | No documented limit (safe up to 1,000 workflows) | No documented limit (safe up to 100,000 tasks/mo) | No documented limit |
| Audit trail / compliance logging | Basic (contact history) | 90-day execution log (dashboard) | 30-day execution log | 30-day execution log |
| Reliability (uptime SLA) | 99.9% | 99.5% | 99.9% | 99.5% |
| Support | Email + community | Email + Slack community | Email + live chat | Email + community |
| Best for | Simple automations, single-client workflows | Multi-app sync, cost-sensitive scaling, 20+ clients | Complex logic, single high-value clients, unlimited integrations | Complex workflows, custom logic, enterprise |
Decision Matrix: Which Tool for Your Use Case?
| Scenario | Recommendation | Why |
|---|---|---|
| Single client, simple email + SMS automation | GHL native | Free, built-in, no setup overhead |
| 5–10 clients, basic multi-app workflows (GHL → Slack) | GHL native + Pabbly | GHL handles automation, Pabbly handles notification layer |
| 20–50 clients, moderate workflows (GHL ↔ Sheets, Stripe, Slack) | Pabbly (primary) + GHL native (secondary) | Pabbly scales cost-effectively; offload simple triggers to GHL |
| 50+ clients, mission-critical workflows (high churn cost if workflow fails) | Pabbly + redundant failsafe (email alert or backup Zapier) | Hybrid redundancy ensures reliability |
| Complex conditional logic (route leads by source AND value AND timezone) | Zapier or Make | Pabbly’s if/then logic is basic; Zapier Paths handle complex routing |
| Enterprise or compliance-heavy (healthcare, legal, finance) | Zapier (SOC 2) or Make | Better audit trail, compliance certifications, dedicated support |
Hybrid Approach (Recommended for Agencies)
GHL Native:
├─ Tag-based automations (lead → tag → email)
├─ SMS broadcasts
└─ Pipeline moves

Pabbly Connect:
├─ GHL → Slack notifications
├─ GHL ↔ Google Sheets sync
├─ Stripe/PayPal → GHL contact tag
└─ Twilio SMS ↔ GHL contact

Zapier (if needed):
└─ Complex conditional routing (Zapier Paths)
Cost at 30 clients:
- GHL native: $0
- Pabbly (5 workflows/client × 30 = 150 workflows): $450–$600/month (bulk rate)
- Zapier (only for 3 complex workflows): $20/month
- Total: $470–$620/month (vs. $3,000–$6,000/month all-Zapier)
Part 2: Pabbly Connect Account Setup
Step 1: Create Pabbly Account
- Go to pabbly.com and click Sign Up
- Enter email and password
- Verify email via link
- Log in to Pabbly Connect dashboard
- Choose your plan:
- Free: Up to 5 workflows, 1,000 tasks/month (testing only)
- Starter: $19/month, 20 workflows, unlimited tasks
- Pro: $49/month, 100 workflows, unlimited tasks
- Business: $99/month, 500 workflows, unlimited tasks
- For 30 clients: Choose Pro ($49/month for 100 workflows). Most agencies start here.
Step 2: Understand Pabbly Pricing Model
Task vs. Workflow:
- Workflow = one automation rule (e.g., “when GHL contact is created, send Slack message”)
- Task = one execution of that workflow (e.g., 50 contacts created = 50 tasks)
Pabbly charges per workflow per month, not per task. One workflow processing 100 tasks costs the same as one workflow processing 10,000 tasks.
Cost breakdown:
Starter plan: $19/month
├─ Includes: 20 workflows
├─ Each additional workflow: +$1/month
└─ 10 extra workflows (30 total) = $19 + $10 = $29/month

Pro plan: $49/month
├─ Includes: 100 workflows
├─ Each additional workflow: +$0.99/month (bulk rate)
└─ 150 workflows total = $49 + (50 × $0.99) = $99/month
For 30 clients with 5 workflows each (150 total workflows):
- Pabbly: $99/month (or $1,188/year)
- Zapier: $3,000–$6,000/month ($36,000–$72,000/year)
- Savings: $35,000–$70,000/year
Step 3: Connect Pabbly to Your Bank Account (Payment)
- In Pabbly Dashboard, go to Billing (top right)
- Click Payment Method
- Enter credit card or PayPal
- Select plan and click Subscribe
- You’re now on a paid plan
Note: Free plan is useful for testing 1–2 workflows before upgrading.
Part 3: Connect GoHighLevel to Pabbly

Step 1: Get GHL API Key
- Log into GoHighLevel
- Go to Settings (left sidebar) → Integrations → API Keys
- If no API key exists, click Create New Key
- Copy the API key (looks like:
abc123def456ghi789jkl...) - Store it securely (never share; treat like a password)
Rate limits:
- GHL API allows 120 requests per minute per API key
- Pabbly workflows typically use 1–3 requests per execution
- Safe limit: up to 40–60 workflows running simultaneously without hitting rate limits
- For 100+ workflows, contact GHL support to request higher rate limits or use multiple API keys
Step 2: Connect GHL to Pabbly
- In Pabbly Connect, go to Connections (left sidebar)
- Click Add Connection
- Search for GoHighLevel (or HighLevel)
- Click GoHighLevel → Authorize
- A popup appears asking for:
- API Key: Paste the GHL API key from Step 1
- Domain: Leave as default (gohighlevel.com)
- Click Authorize
- Pabbly confirms: “GoHighLevel connected”
Troubleshooting if connection fails:
- Check API key is correct (no extra spaces, copy from GHL Settings exactly)
- Verify API key has “Integration” permissions in GHL (go to GHL Settings → API Keys → check permissions)
- If still fails, generate a new API key in GHL and retry
Step 3: Test the Connection
- In Pabbly Connections, find GoHighLevel and click Test
- Pabbly checks if the API key is valid
- If test passes, you see: “Connection successful”
- If test fails, check API key permissions in GHL
You now have: Pabbly connected to GHL and ready to build workflows.
Part 4: Workflow 1 — New GHL Lead → Slack Notification
Goal: When a new contact is created in GHL, automatically send a notification to Slack (e.g., sales channel) with contact details.
Architecture:
New contact added to GHL
  ↓
Pabbly webhook trigger fires
  ↓
Pabbly retrieves contact details from GHL API
  ↓
Message formatted and sent to Slack
  ↓
Sales team sees notification instantly
Step 1: Create New Workflow
- In Pabbly Connect, click Create New Workflow
- Name it: “GHL New Lead → Slack Alert”
- Click Create
Step 2: Add Trigger — New Contact in GHL
- Click Add Trigger (top left of canvas)
- Search for GoHighLevel
- Select New Contact (or Contact Created)
- Click Continue
- GHL Account: Select your GHL connection (from Part 3)
- Business: Select the GHL business/location (if multiple)
- Click Continue
- Test Trigger: Click this to verify Pabbly can communicate with GHL
- If test passes, you see: “Trigger Verified”
- If test fails, check API key (Part 3, Step 1)
Step 3: Add Filter (Optional) — Only Notify for Qualified Leads
Add a filter so Slack only gets notified for leads matching criteria (saves Slack spam):
- Click + Add Filter
- Set condition:
- If
Pipelineequals “Sales Pipeline” Then Continue - Else Stop workflow
- If
- Click Continue
Why filter?: If you have test contacts or low-quality leads, filtering reduces Slack noise. Only notify on high-value leads.
Step 4: Add Action — Send Slack Message
- Click Add Action (bottom of canvas, or + button)
- Search for Slack
- Select Send Message to Channel
- Click Continue
- Slack Workspace: Click Authorize if first time
- Slack popup opens; select workspace
- Grant Pabbly permission to post to Slack
- Return to Pabbly
- Slack Channel: Select the channel (e.g., #sales, #leads)
- Message Format:
🔔 New Lead in GHL! Name: {First Name} {Last Name} Email: {Email} Phone: {Phone Number} Source: {Source} Pipeline: {Pipeline} 👉 [View in GHL](https://app.gohighlevel.com/contacts/{Contact ID}) - Map fields:
- Click on
{First Name}placeholder - Select First Name from GHL trigger (Pabbly auto-populates available fields)
- Repeat for each placeholder
- Click on
- Click Continue
Step 5: Test Workflow
- Click Test & Review (top right)
- Create a test contact in GHL (e.g., “Test Lead”)
- Wait 5–10 seconds
- Check Slack channel — you should see the notification with contact details
- If no notification, check:
- Slack channel is correct (workflow action shows channel name)
- Pabbly workflow is On (toggle in top left)
- Slack authorization didn’t expire (re-authorize if needed)
Step 6: Activate Workflow
- Toggle On (top left of workflow canvas)
- Workflow is now live — all new GHL contacts will trigger Slack notifications
Expected result:
- Seconds after contact created in GHL, Slack message appears
- Sales team is instantly notified
- Click the GHL link to jump to contact record
Part 5: Workflow 2 — GHL Contact Updated → Google Sheets Sync
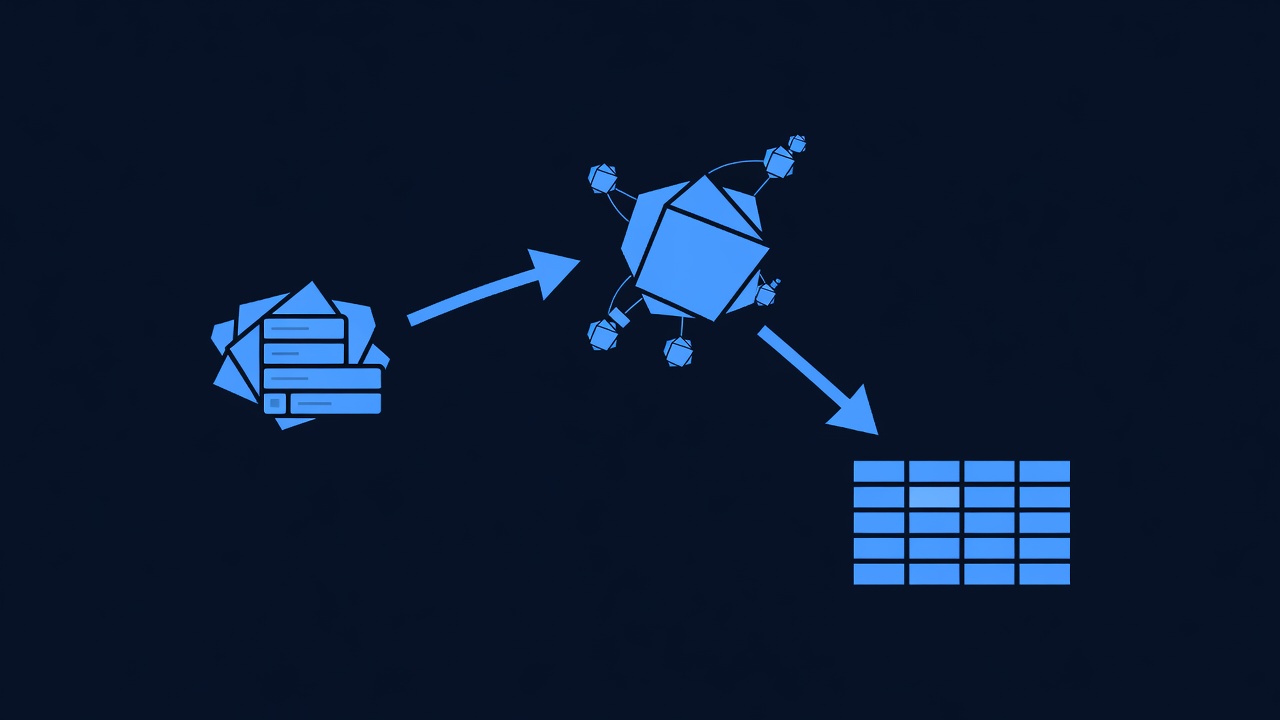
Goal: When a contact in GHL is updated (e.g., pipeline moved, tag added, phone changed), automatically add or update a row in Google Sheets for tracking and reporting.
Architecture:
Contact updated in GHL (tag added, value changed, pipeline moved)
  ↓
Pabbly webhook detects update
  ↓
Pabbly searches for existing row in Google Sheets (by email or phone)
  ↓
If row exists: update values
If row doesn't exist: create new row
  ↓
Sheets now mirrors GHL contact data
Step 1: Create Google Sheets Document
- Open Google Sheets (sheets.google.com)
- Create new sheet: “GHL Contacts Sync”
- Add column headers (row 1):
- A: Email
- B: First Name
- C: Last Name
- D: Phone
- E: Pipeline
- F: Status
- G: Tags
- H: Last Updated
- Save sheet (Ctrl+S or Cmd+S)
- Copy the Sheet URL from address bar (e.g.,
https://docs.google.com/spreadsheets/d/1a2b3c4d5e6f7g8h9i0j/edit)
Step 2: Create New Workflow
- In Pabbly Connect, click Create New Workflow
- Name it: “GHL Contact Updated → Google Sheets”
- Click Create
Step 3: Add Trigger — Contact Updated in GHL
- Click Add Trigger
- Search for GoHighLevel
- Select Contact Updated (or Contact Modified)
- Click Continue
- GHL Account: Select your connection
- Click Continue → Test Trigger
- Pabbly verifies trigger
Step 4: Add Action — Find or Create Row in Google Sheets
- Click Add Action
- Search for Google Sheets
- Select Update Spreadsheet Row (or Find or Create Row)
- Click Continue
- Google Account: Click Authorize
- Google popup opens; grant Pabbly access to Sheets
- Return to Pabbly
- Spreadsheet: Select “GHL Contacts Sync” sheet from list
- Worksheet: Select Sheet1 (or the sheet where you added headers)
- Row Identifier (critical):
- Set to Email field (the “find by” column)
- Pabbly will search for existing row with matching email
- If found: update row; if not found: create new row
- Map fields (enter data to write to Sheets):
- A (Email) =
Email(from GHL trigger) - B (First Name) =
First Name - C (Last Name) =
Last Name - D (Phone) =
Phone - E (Pipeline) =
Pipeline - F (Status) =
Status - G (Tags) =
Tags(join with comma) - H (Last Updated) =
Now(Pabbly function for current timestamp)
- A (Email) =
- Click Continue
Step 5: Test Workflow
- Click Test & Review (top right)
- Update a contact in GHL (e.g., add a tag or change phone)
- Wait 5–10 seconds
- Open Google Sheets and refresh
- You should see:
- New row created (if contact was new to Sheets)
- Existing row updated (if contact email already in Sheets)
- If no update, check:
- Google Sheets authorization (re-authorize if needed)
- Row Identifier is set to Email (not Name or other field)
- Column headers match mapped fields exactly
Step 6: Activate Workflow
- Toggle On (top left)
- Workflow is now live — all GHL contact updates will sync to Google Sheets
Expected result:
- Real-time sync between GHL and Google Sheets
- Team can use Sheets for reporting, filtering, bulk exports
- Audit trail: “Last Updated” column shows when row was last changed
Part 6: Workflow 3 — Stripe Payment → GHL Contact Tag
Goal: When a customer pays an invoice in Stripe, automatically tag the contact in GHL (e.g., “paid_customer”, “invoice_12345”) to trigger follow-up automations.
Architecture:
Customer pays invoice in Stripe
  ↓
Pabbly webhook receives Stripe event
  ↓
Pabbly queries GHL to find contact (by email)
  ↓
Pabbly applies tag to contact
  ↓
GHL automation triggers based on tag (send receipt email, create task, move pipeline)
Step 1: Create New Workflow
- In Pabbly Connect, click Create New Workflow
- Name it: “Stripe Payment → GHL Tag”
- Click Create
Step 2: Add Trigger — Payment Completed in Stripe
- Click Add Trigger
- Search for Stripe
- Select Payment Succeeded (or Charge Completed)
- Click Continue
- Stripe Account: Click Authorize
- Stripe popup opens; log in and grant Pabbly access
- Return to Pabbly
- Click Continue → Test Trigger
- Pabbly verifies Stripe connection
Step 3: Add Filter — Only for GHL-Related Payments
Add a filter to ensure we only tag payments related to GHL (not unrelated Stripe payments):
- Click + Add Filter
- Set condition:
- If
Descriptioncontains “GHL” orMetadatacontains “ghl_client_id” - Then Continue
- If
- Click Continue
Why filter?: If you process other payments in Stripe, filtering prevents tagging unrelated contacts.
Step 4: Add Action — Find Contact in GHL
- Click Add Action
- Search for GoHighLevel
- Select Find Contact (look up contact by email)
- Click Continue
- GHL Account: Select your connection
- Email: Map to Stripe event’s
Receipt EmailorCustomer Email - Click Continue
Step 5: Add Second Action — Update Contact with Tag
- Click Add Action (below previous action)
- Search for GoHighLevel
- Select Update Contact
- Click Continue
- GHL Account: Select your connection
- Contact ID: Map to output from Step 4 (Find Contact)
- Tag: “paid_customer” or “invoice_completed”
- Custom Field: (Optional) Add invoice amount, date, receipt URL
- Click Continue
Step 6: Test Workflow
- Click Test & Review (top right)
- In Stripe, create a test charge or use a recent payment
- Check GHL contact — tag should be applied
- If no tag:
- Check email matches between Stripe and GHL
- Verify Stripe authorization is active
- Check filter condition (payment might not match filter criteria)
Step 7: Activate Workflow
- Toggle On (top left)
- Workflow is now live — all Stripe payments will tag GHL contacts
Expected result:
- Customer pays invoice in Stripe
- Contact auto-tagged in GHL within 5–10 seconds
- GHL automation triggered by tag (send receipt, create follow-up task, etc.)
Advanced step (optional): Create GHL automation that triggers on “paid_customer” tag:
- Go to GHL Automations
- Trigger: Tag applied = “paid_customer”
- Action: Send email (“Thank you for your payment!”) or create task (“Follow up with upsell”)
Part 7: Workflow 4 — Twilio SMS ↔ GHL Contact
Goal: When a contact texts a Twilio number, automatically log the SMS in GHL contact record and send a notification to your team Slack channel.
Prerequisites:
- Twilio account with active phone number (see Part 2 of Twilio guide if needed)
- Twilio webhook configured to send inbound SMS to Pabbly
Architecture:
Inbound SMS arrives at Twilio
  ↓
Twilio webhook triggers Pabbly workflow
  ↓
Pabbly finds/creates contact in GHL
  ↓
Message logged in GHL custom field
  ↓
Team notified in Slack
Step 1: Configure Twilio Webhook to Pabbly
- Log into Twilio Console (twilio.com)
- Go to Phone Numbers → Active Numbers → Select your number
- Scroll to Messaging section
- Find A Message Comes In and select Webhook
- Webhook URL: You’ll get this from Pabbly in Step 2 (come back here after creating workflow)
- Click Save
Step 2: Create New Workflow in Pabbly
- In Pabbly Connect, click Create New Workflow
- Name it: “Twilio Inbound SMS → GHL Contact”
- Click Create
Step 3: Add Trigger — Inbound SMS (Webhook)
- Click Add Trigger
- Search for Twilio
- Select Incoming SMS or New Message
- Click Continue
- Twilio Account: Click Authorize
- Twilio popup opens; grant Pabbly access
- Return to Pabbly
- Webhook URL appears in Pabbly (looks like:
https://hook.pabbly.com/workflow/123abc...) - Copy this URL and paste into Twilio webhook (go back to Twilio Step 1, Step 5)
- In Pabbly, click Continue → Test Trigger
Step 4: Add Action — Find or Create Contact in GHL
- Click Add Action
- Search for GoHighLevel
- Select Find or Create Contact
- Click Continue
- GHL Account: Select your connection
- Phone: Map to Twilio trigger’s
Fromfield (the sender’s phone) - Advanced Options: Toggle Fuzzy Match: ON (normalizes phone formats)
- Click Continue
Step 5: Add Second Action — Update Contact with SMS
- Click Add Action
- Search for GoHighLevel
- Select Update Contact
- Click Continue
- GHL Account: Select your connection
- Contact ID: Map to output from Step 4 (contact ID)
- Custom Field: SMS Message Archive: Map to Twilio
Body(the message text) - Custom Field: SMS From: Map to Twilio
From - Custom Field: SMS Timestamp: Map to Twilio
DateSentorNow - Tag: ”